Overview

pi) is an open-source, terminal-native coding agent (a command-line tool) from Earendil Works. It supports multiple model providers, custom providers, and pluggable tools, making it well-suited for code assistance and task automation from the command line.
Pi supports custom model providers and the Anthropic Messages API. By configuring EvoLink as a custom provider in ~/.pi/agent/models.json, you can use EvoLink’s Claude model family in Pi while retaining Pi’s complete agent tool-calling capabilities.
Pi’s official focus is the terminal CLI (four run modes: interactive / print / JSON / RPC, plus embedding via the Node.js SDK), and this guide follows the CLI.
Before You Begin
Before starting the configuration, make sure you have completed the following preparations:1. Install the Pi Coding Agent CLI
Pi requires Node.js ≥ 22.19.0. First check your version with
node -v; below this version, npm install -g prints an EBADENGINE warning and the installed CLI may fail to run, so upgrade Node first.- curl script
- npm
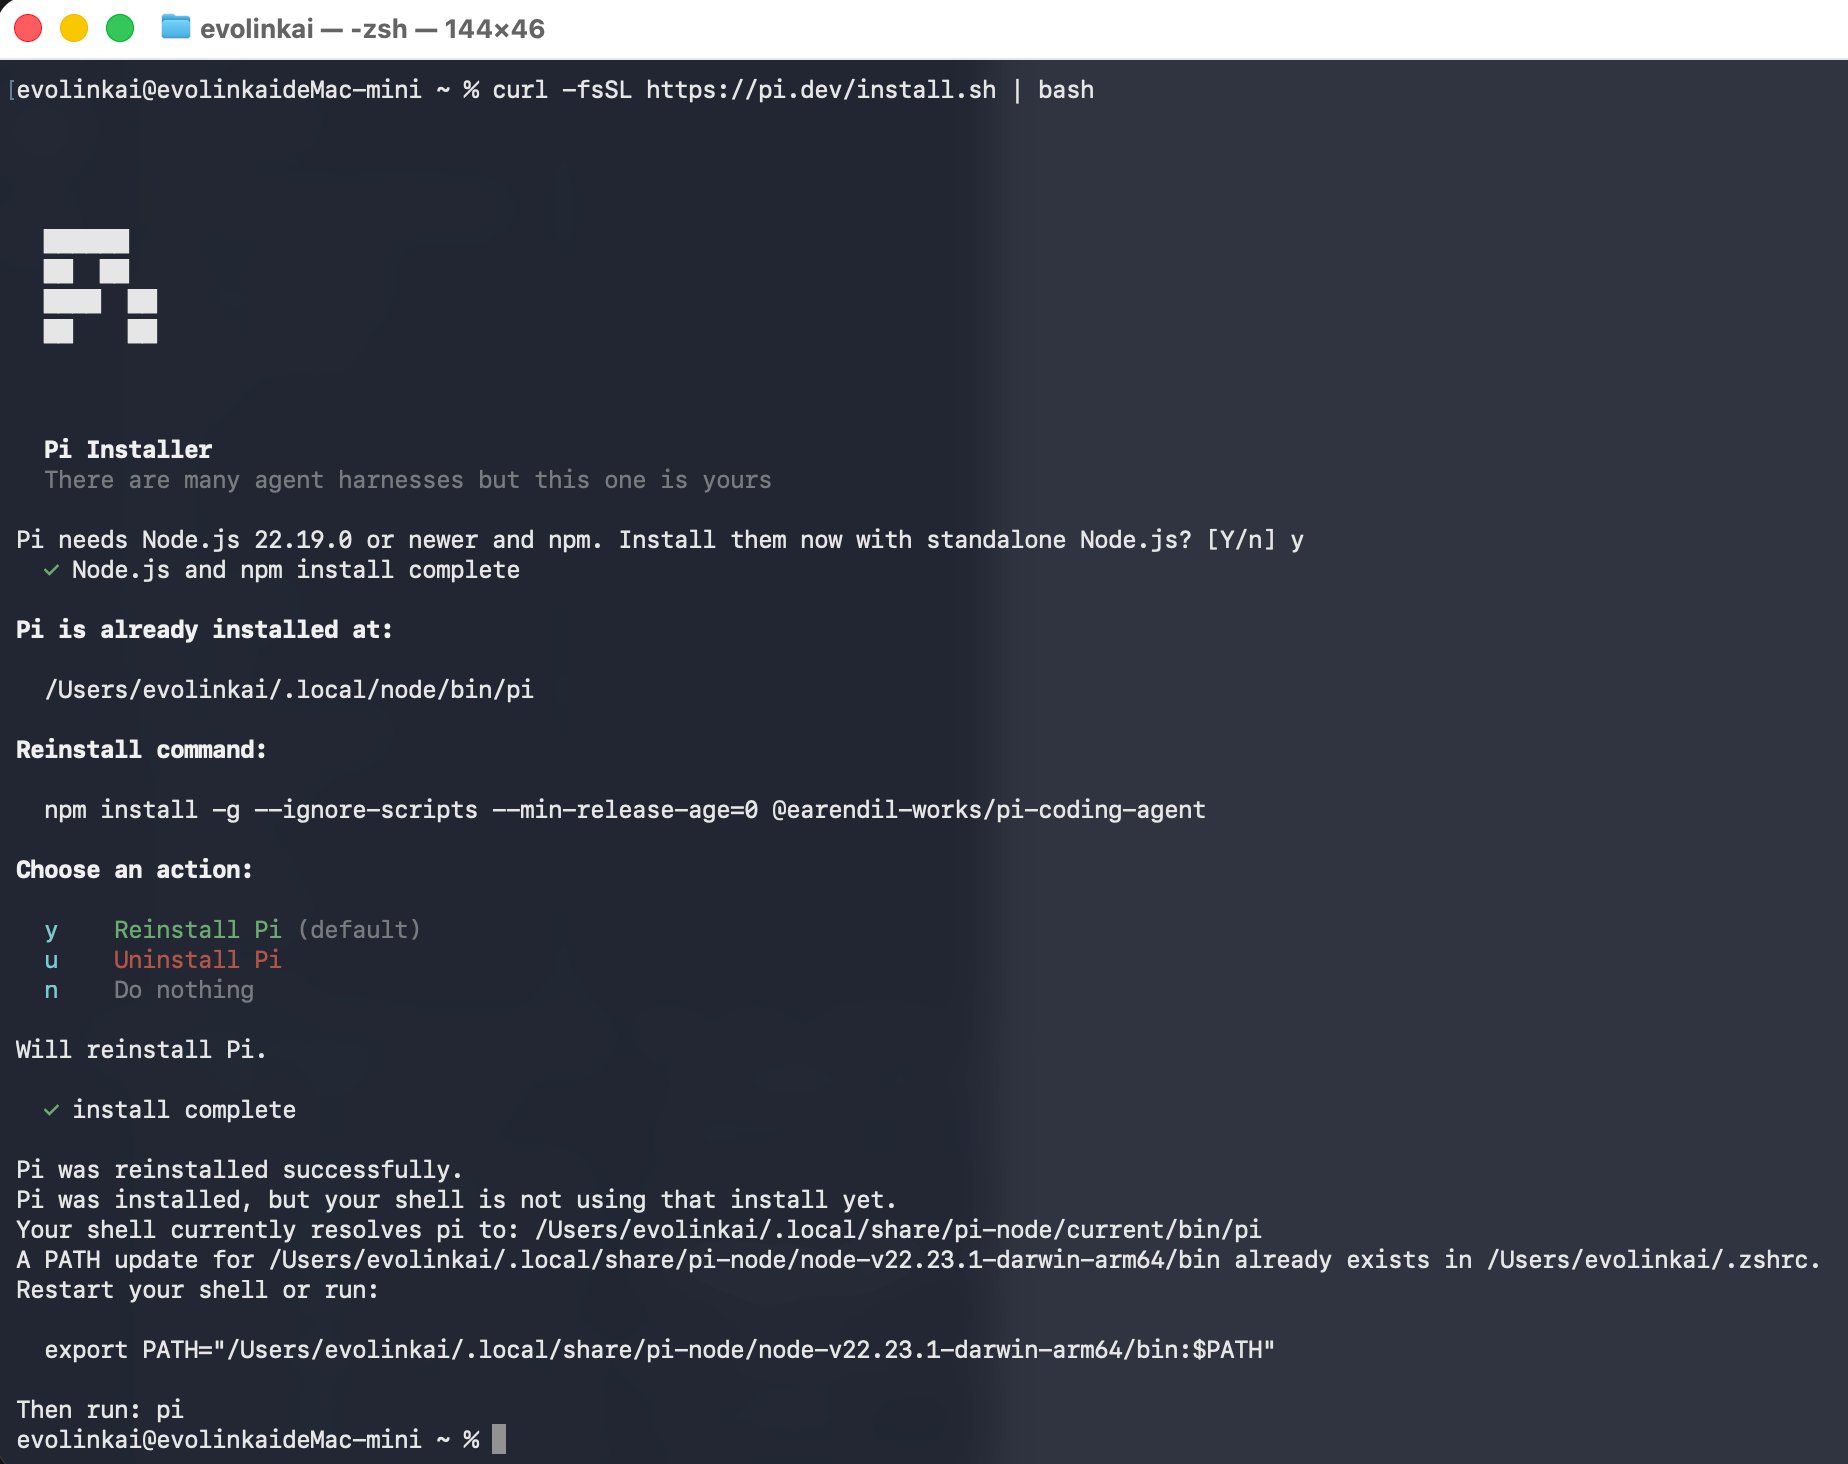
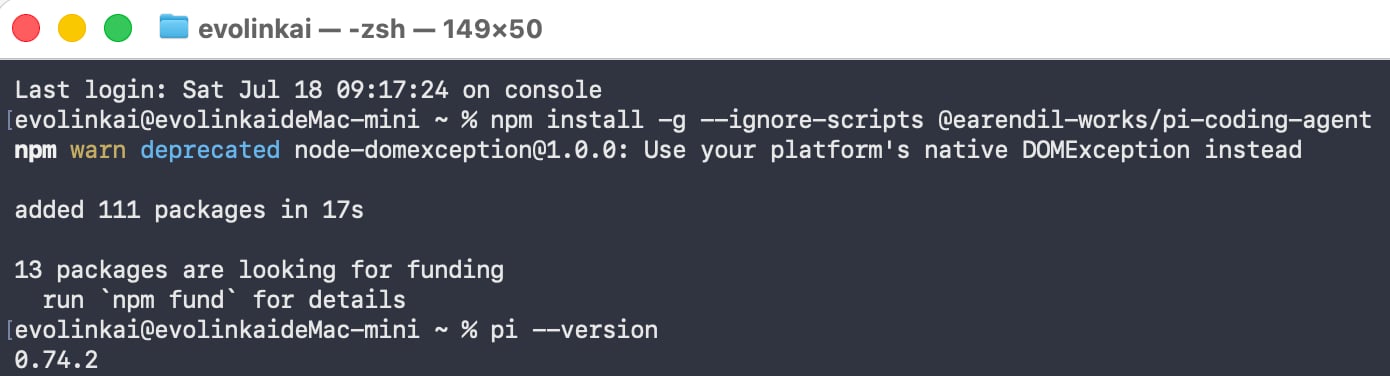
pi command is available:
2. Get an EvoLink API Key
- Log in to the EvoLink console
- Find API Keys in the console, click the “Create New Key” button, then copy the generated key
- The API Key usually starts with
sk-. Please keep it safe.
Step 1: Configure the EvoLink Provider
Pi defines providers and models through a config file namedmodels.json, located in the .pi/agent/ folder inside your home directory (full path ~/.pi/agent/models.json). Claude models frequently use tool_use / tool_result in Pi, so this guide uses EvoLink’s Anthropic Messages-compatible API and configures it as a custom provider of type anthropic-messages.
~ stands for your home directory (/Users/your-username on macOS, /home/your-username on Linux). .pi starts with a dot, making it a hidden folder that Finder / File Explorer won’t show by default — so the easiest way to create the file below is via the command line. Just copy and paste..pi folder usually isn’t created until Pi runs), so you need to create it manually. Follow these three steps:
1
Open a terminal
- macOS: Press
Command + Spaceto open Spotlight, typeTerminal, and press Enter. - Windows: Search for
PowerShellin the Start menu and open it.
2
Create the config folder and a new file
Paste the following command into the terminal and press Enter. It automatically creates the needed folder and opens an empty This drops you into the
models.json in a text editor:- macOS / Linux
- Windows (PowerShell)
nano editor (a simple text editor inside the terminal).3
Paste the configuration and save
Copy the complete configuration below and paste it into the editor you just opened:Then save:
- nano (macOS / Linux): Press
Control + Othen Enter to save, thenControl + Xto exit. - Notepad (Windows): Press
Control + Sto save, then close the window.
api: "anthropic-messages"— uses EvoLink’s Anthropic Messages-compatible route, so Pi uses Claude’s nativetool_use/tool_resultprotocol.- Set
baseUrlonly to the domain roothttps://direct.evolink.ai— do not manually add/v1or/v1/messages. Pi appends/v1/messagesautomatically; adding it manually duplicates the path and causes a404 Invalid URL. authHeader: trueis required. This field makes Pi attach anAuthorization: Bearer <your-key>request header. EvoLink’s/v1/messagesonly accepts Bearer authentication, while Pi’s built-in Anthropic SDK only sendsx-api-keyby default — omitting this field returns a401.apiKeyhas two forms — pick one:- Option 1 · Paste the key directly (simplest, good for local personal use): replace
"$EVOLINK_API_KEY"in the config with your real key, e.g."apiKey": "sk-your-real-key". Done in one step, no environment variable needed; the downside is the key sits in plaintext in the config file, so don’t share this file or commit it to Git. - Option 2 · Environment variable interpolation (more secure, recommended): keep
"$EVOLINK_API_KEY"as is and put the real key in an environment variable (see “Set the API Key Environment Variable” below). This keeps the plaintext key out of the config file. - (Advanced) Pi’s
apiKeyalso supports${EVOLINK_API_KEY}(equivalent; use braces to disambiguate when the variable name is immediately followed by literal text) and!command(a leading!runs a command and uses its output as the key, for example reading from a password manager:"!op read 'op://vault/item/credential'"). If you need a literal$or!in the value, escape them as$$and$!.
- Option 1 · Paste the key directly (simplest, good for local personal use): replace
Don’t want to touch the key in the config file? You can also use
/login in interactive mode to select this provider and store the key in ~/.pi/agent/auth.json — the effect is equivalent.Set the API Key Environment Variable
You only need this step if you chose Option 2 (environment variable interpolation) above. If you chose Option 1 (paste the key directly), the key is already in the config file — skip this section and go straight to Step 2.
$EVOLINK_API_KEY referenced in the configuration above to your real key. Below are both the temporary version (only valid in the current terminal window; gone once you close it — good for a first test run) and the persistent version (loaded automatically every time you open a terminal):
- macOS / Linux
- Windows (PowerShell)
Temporary (current terminal window; lost when closed):Persistent (written to your shell config file; applied automatically in every new terminal):
Not sure which shell you’re using? Run
echo $SHELL in the terminal — if the output contains zsh, use ~/.zshrc; if it contains bash, use ~/.bashrc.Step 2: Start Using and Verify
1. Select a Model
Run the following command in your terminal to launch Pi:/model and press Enter in the command palette to open the model selector:
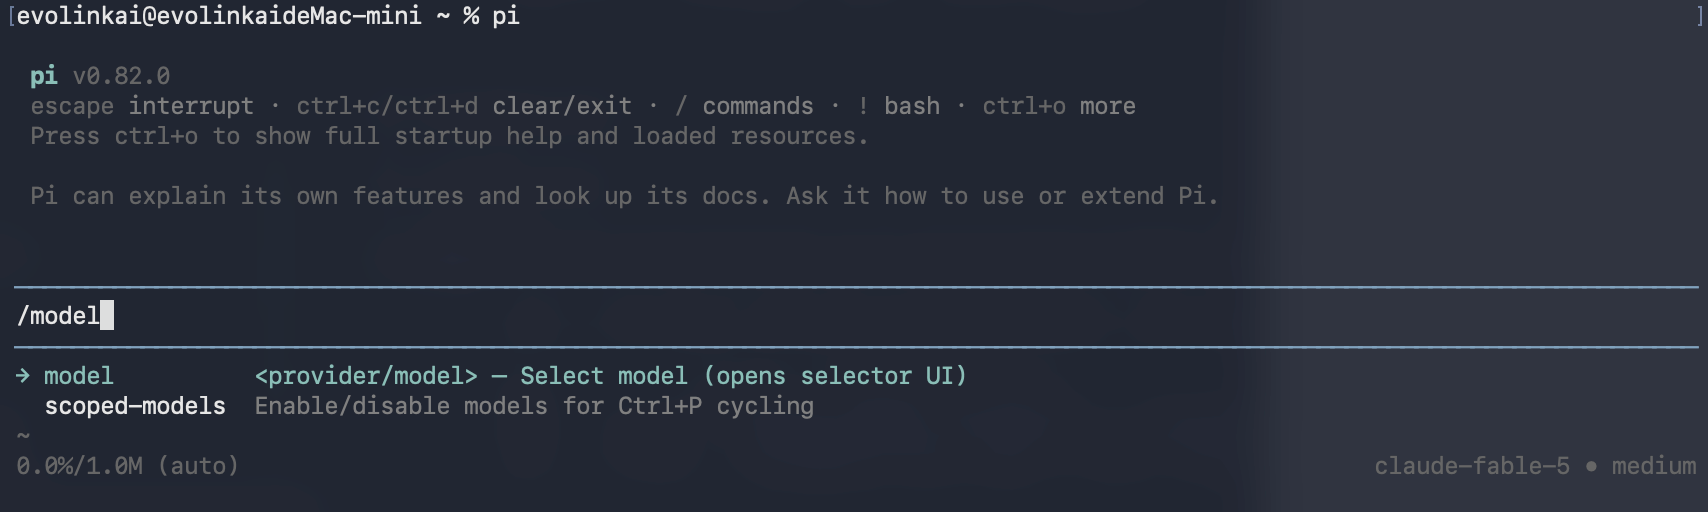
models.json (tagged [evolink]). Use the arrow keys to highlight the model you want (such as claude-fable-5) and press Enter to confirm:
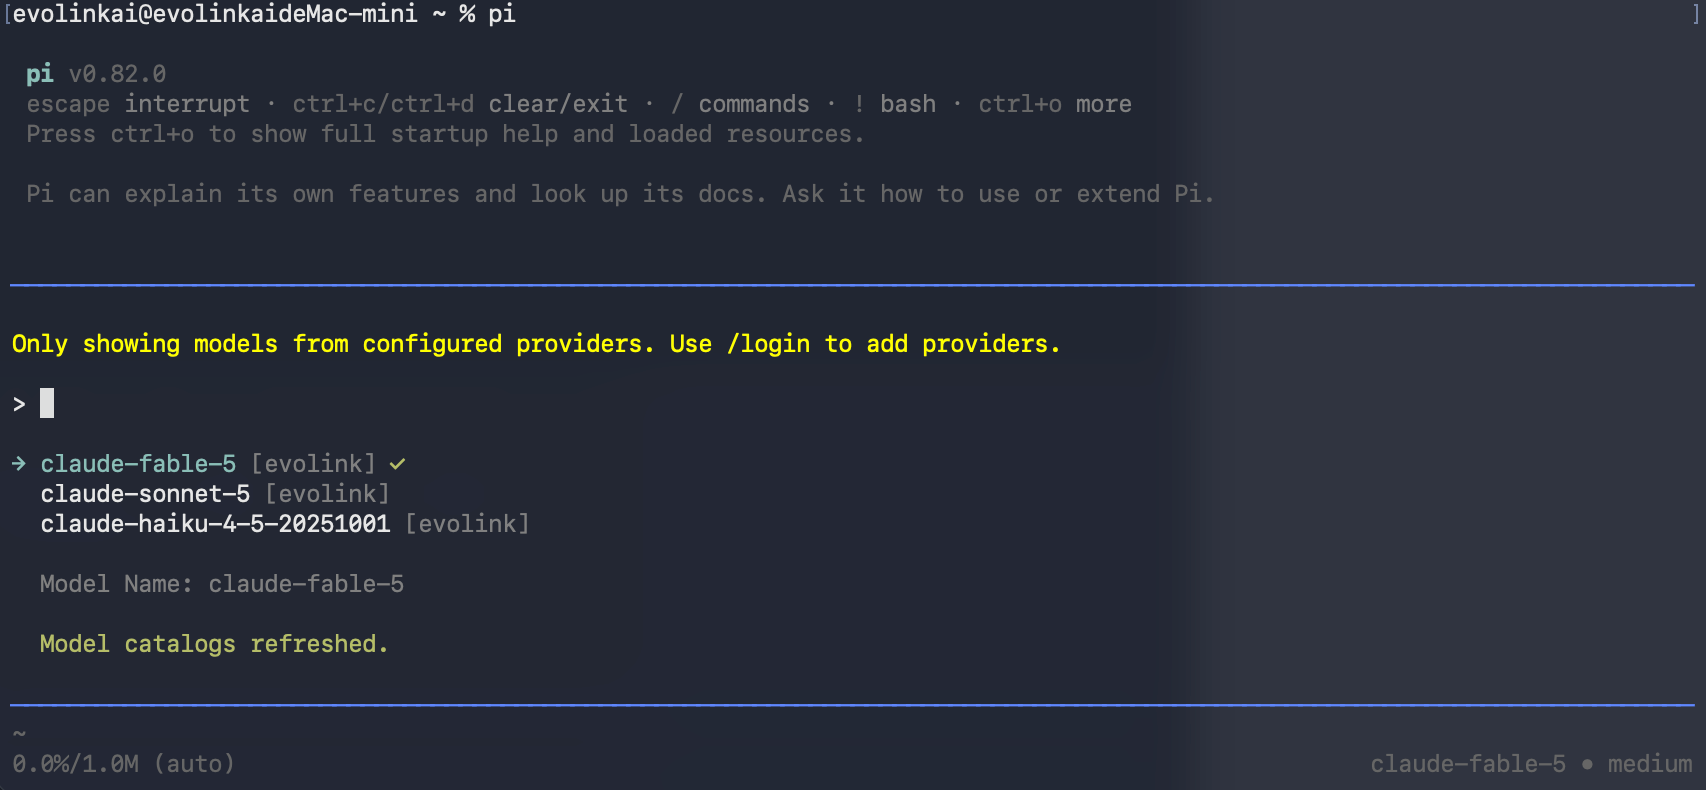
claude-fable-5 · medium and 0.0%/1.0M), confirming the model catalog loaded successfully.
The yellow hint “Only showing models from configured providers. Use /login to add providers.” is expected — Pi only lists models from providers you have configured. Connecting through the EvoLink custom provider does not require
/login.2. Verify the Configuration
After selecting a model, first enter a simple prompt to verify the model response: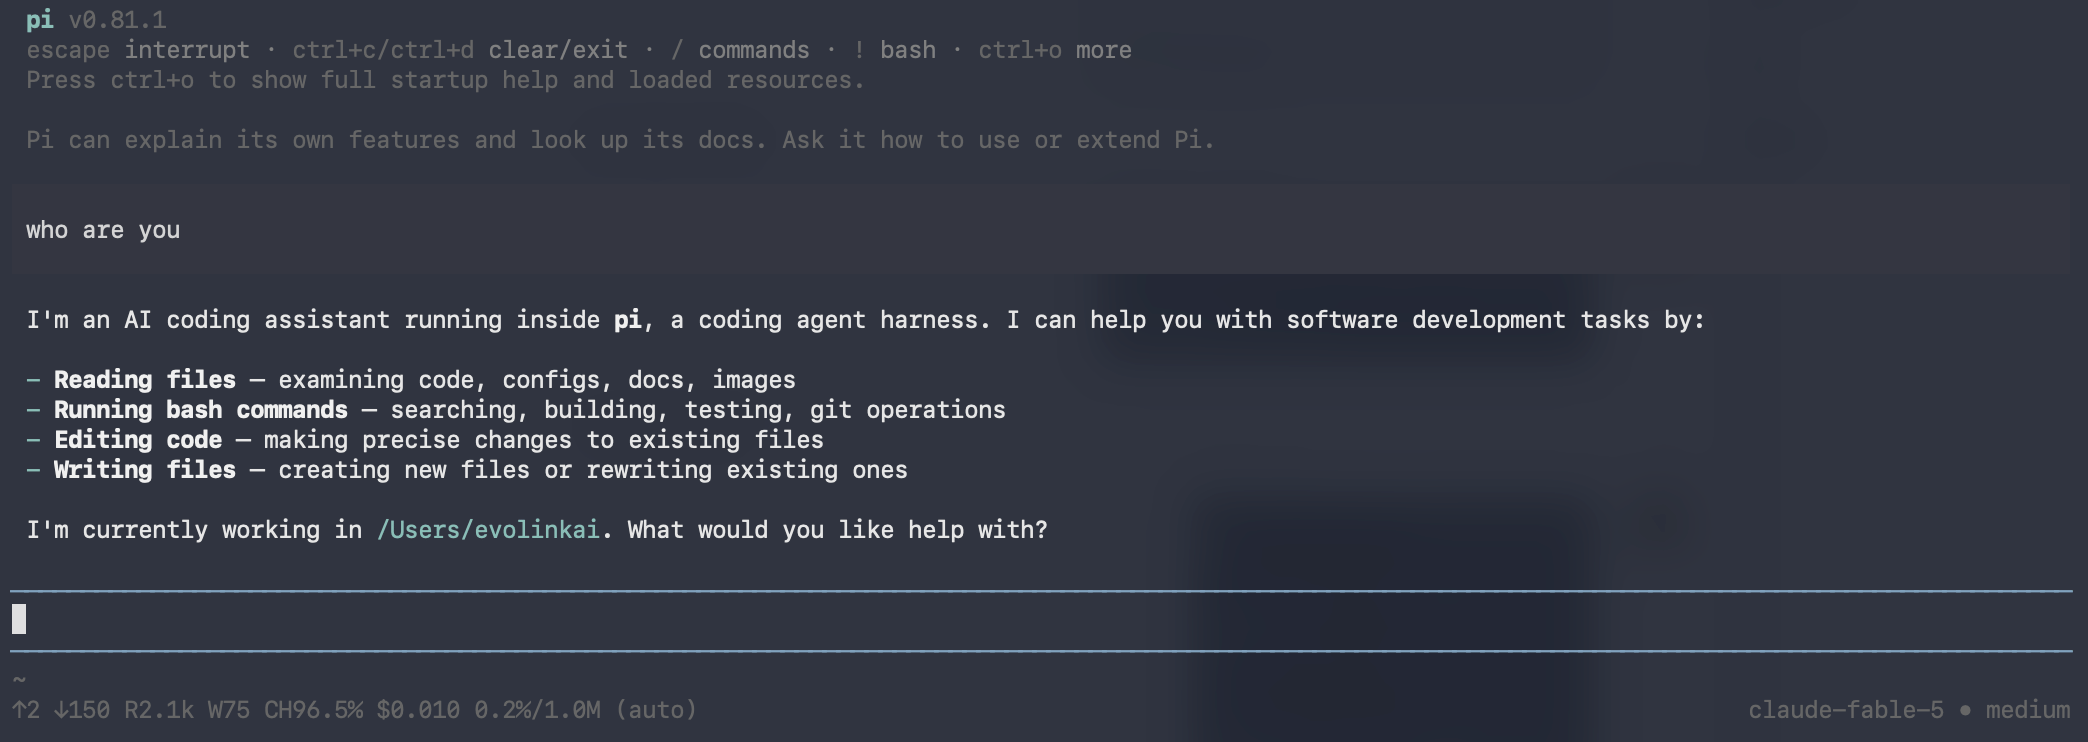
- You see the AI’s normal reply (a few lines of text).
- Pi can call the
lstool in the second task and continue responding. - There are no errors such as
401,404,model_not_found, orUnexpected role "tool".
Troubleshooting
The following is organized by the actual error you see — just find the one that matches.Returns 401 (Invalid API key)
- The environment variable didn’t take effect (most common): run
test -n "$EVOLINK_API_KEY" && echo "Key loaded" || echo "Key not loaded"in the current terminal; on Windows, you need to restart the terminal after usingsetx. - The
apiKeyfield is wrong: confirm thatmodels.jsoncontains"$EVOLINK_API_KEY"(referencing the environment variable), rather than treating the variable name as a literal key. "authHeader": trueis missing: EvoLink’s/v1/messagesrequires a Bearer token, so confirm this field is inside the same provider configuration asapiKey.- The key itself is invalid or has been disabled: check it in the EvoLink console.
Returns 404 Invalid URL
baseUrl. Pi automatically appends /v1/messages, so change baseUrl back to the domain root: https://direct.evolink.ai.
Returns 404 model_not_found
id in models.json exactly matches the model name returned by the EvoLink console / /v1/models.
Returns 400 Unexpected role "tool"
api: "openai-completions" with a Base URL ending in /v1. Pi sends agent tool results with OpenAI’s role: "tool", which the current Claude-compatible route does not accept.
Solution: change these three provider fields:
supportsDeveloperRole or supportsReasoningEffort, because the rejected role is the tool role, not the developer role or a reasoning parameter. Start a new session after updating the configuration.
About Cost
Thecost field in the models.json above is EvoLink’s actual price (a flat 10% discount, in USD per million tokens), for Pi to use as a reference when estimating usage:
Cache Read is the price when the cache is hit (about 0.1× of Input). Actual savings depend on the cache hit rate; the larger the context, the less stable the hits, so the benefit is discounted — don’t treat it as an unconditional low price.
FAQ
How do I open a command-line terminal?
- macOS
- Windows
- Linux
- Option 1: Press
Command + Spaceto open Spotlight, typeTerminal, and press Enter. - Option 2: Go to Applications → Utilities → Terminal.
1. Why set baseUrl only to the domain root?
Because Pi’s anthropic-messages provider automatically appends /v1/messages after baseUrl. Adding /v1 or /v1/messages manually duplicates the path and returns 404 Invalid URL. Use only https://direct.evolink.ai.
2. Do I need to set authHeader: true?
Yes. authHeader: true makes Pi attach an additional Authorization: Bearer <your-key> request header; EvoLink’s /v1/messages uses Bearer authentication, while Pi’s built-in Anthropic SDK only sends x-api-key by default, so omitting it causes a 401.
3. Why does this guide follow the terminal CLI?
Pi’s official primary form is the terminal CLI (four run modes: interactive / print / JSON / RPC, plus embedding via the Node.js SDK). Configuring and verifying the EvoLink integration is all done in the CLI, which is stable and reliable. All steps in this guide follow the CLI.4. How do I avoid writing the API Key in plaintext in the config?
Use environment variable interpolation in theapiKey field (such as "$EVOLINK_API_KEY"), keeping the real key in an environment variable.
5. Which common models does EvoLink support?
EvoLink supports the full Claude family (it also supports GPT, Gemini, and more, which you can view in the console). For planning / complex reasoning,claude-fable-5 is recommended; for everyday execution, use claude-sonnet-5; for lightweight tasks, use claude-haiku-4-5-20251001.