Overview
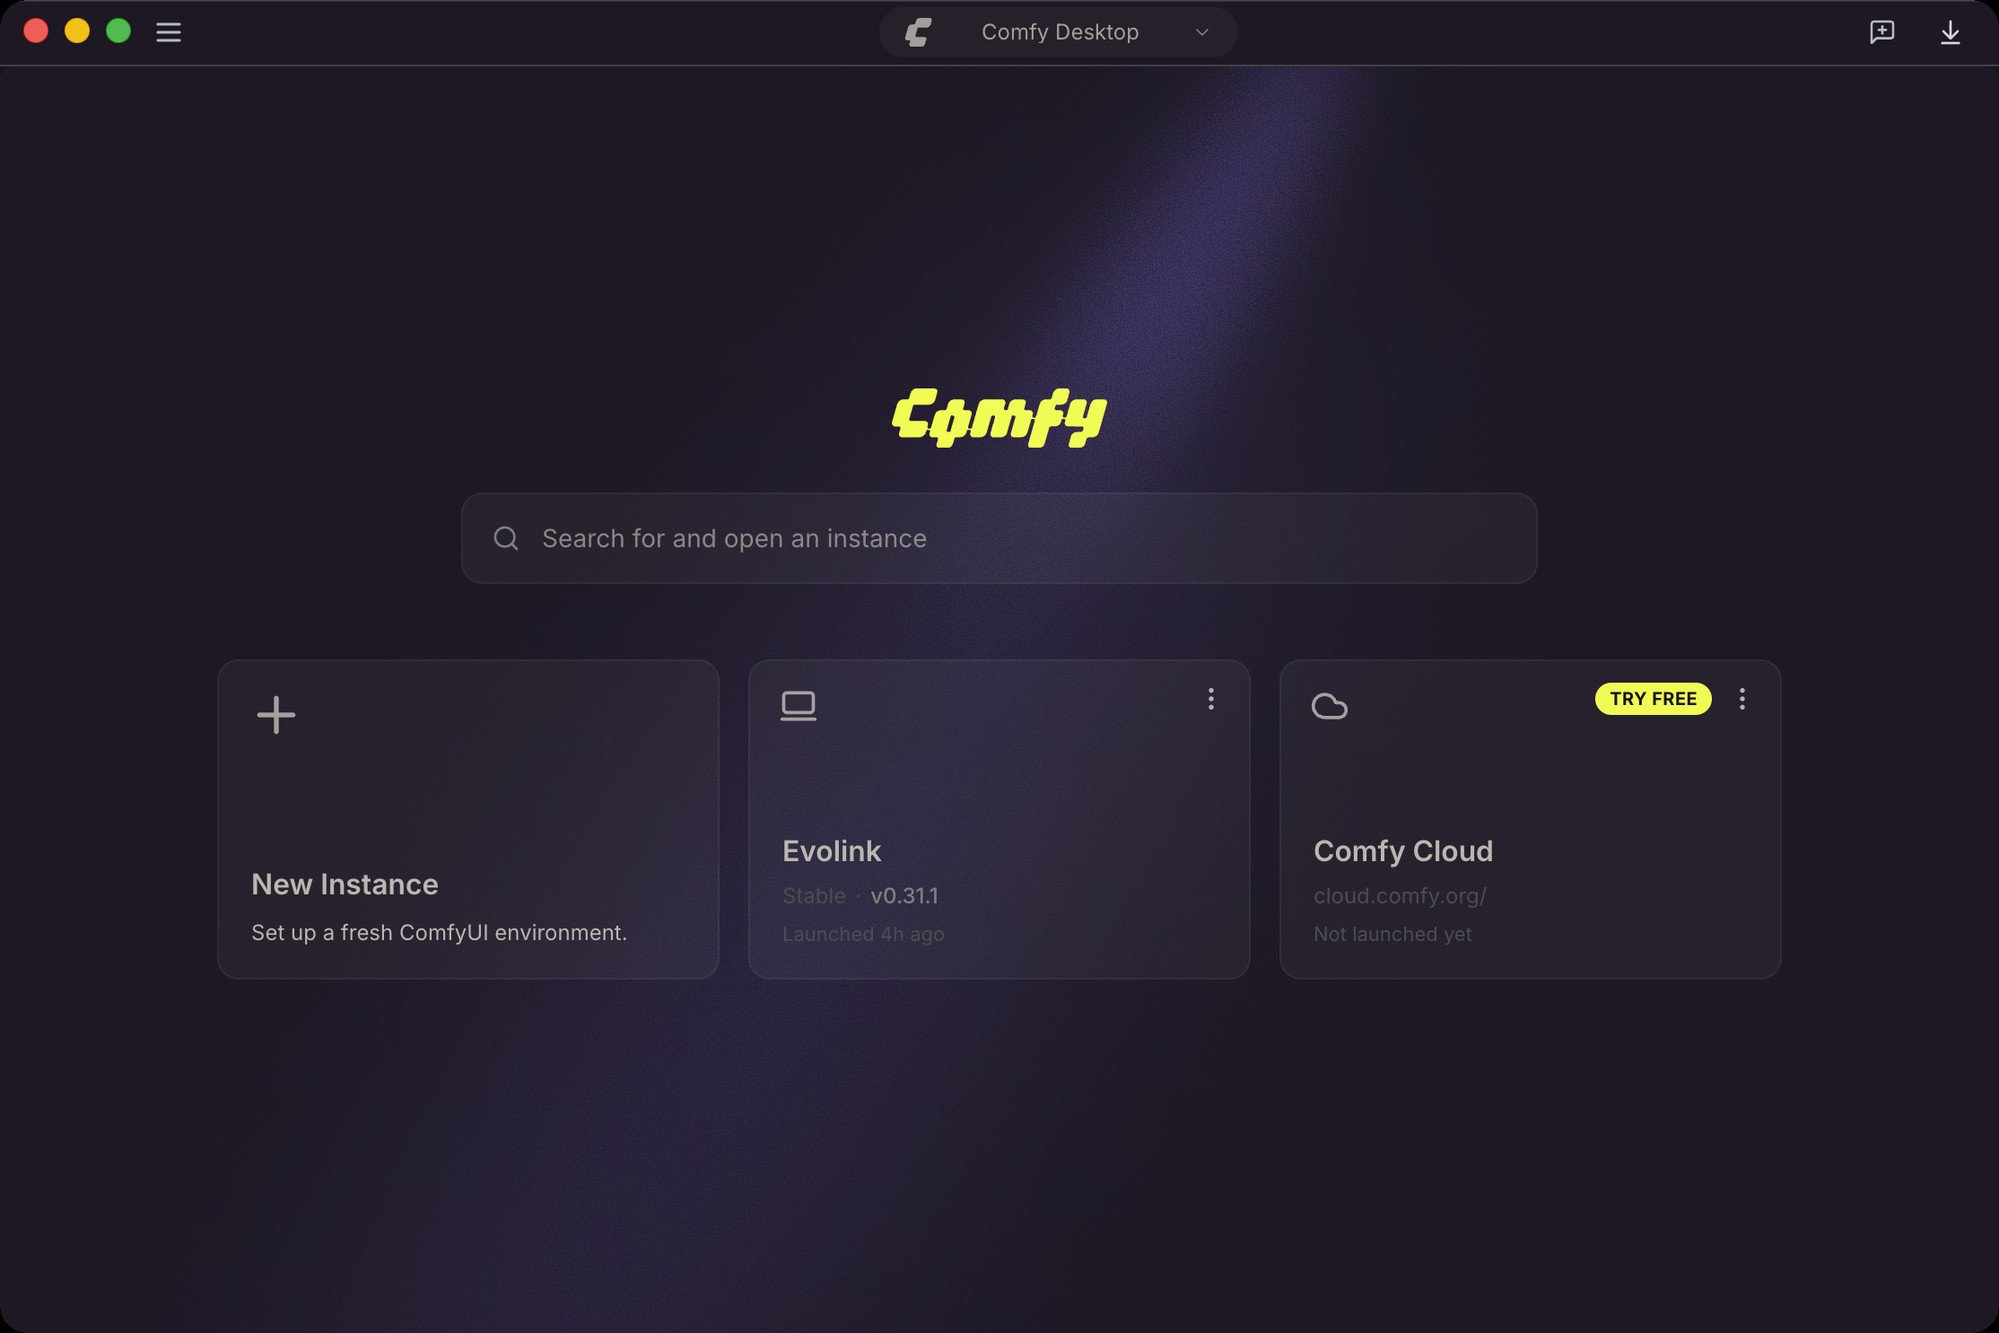
ComfyUI Desktop home: pick or create an instance to enter the canvas (other install types look similar)
gpt-image-2 model directly from your ComfyUI workflows — both text-to-image and image-to-image, with no local GPU required.
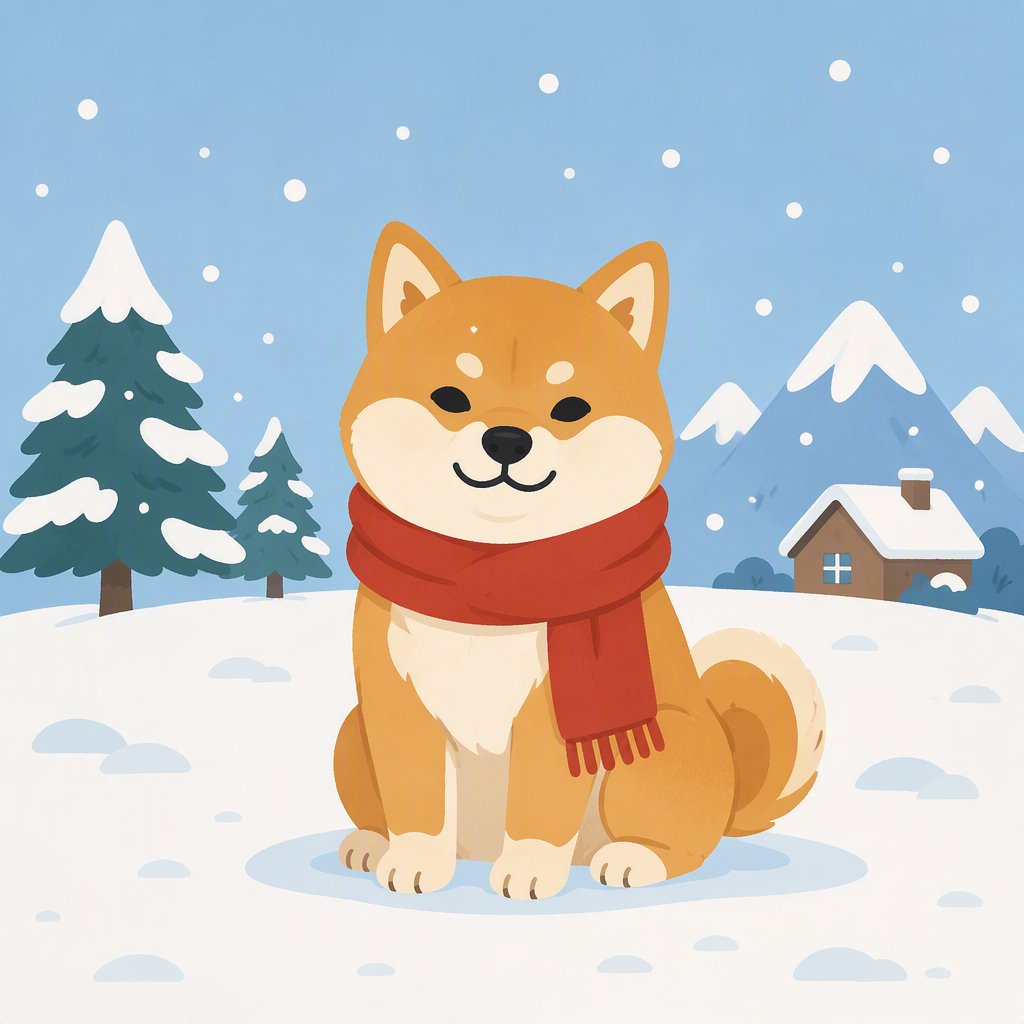
Text-to-image

Image-to-image: redrawn as an anime-style snowy night scene, Shiba and red scarf preserved
Before you start
Get an EvoLink API key
- Log in to the EvoLink dashboard
- Open the API Keys page, create a key and copy it (starts with
sk-)
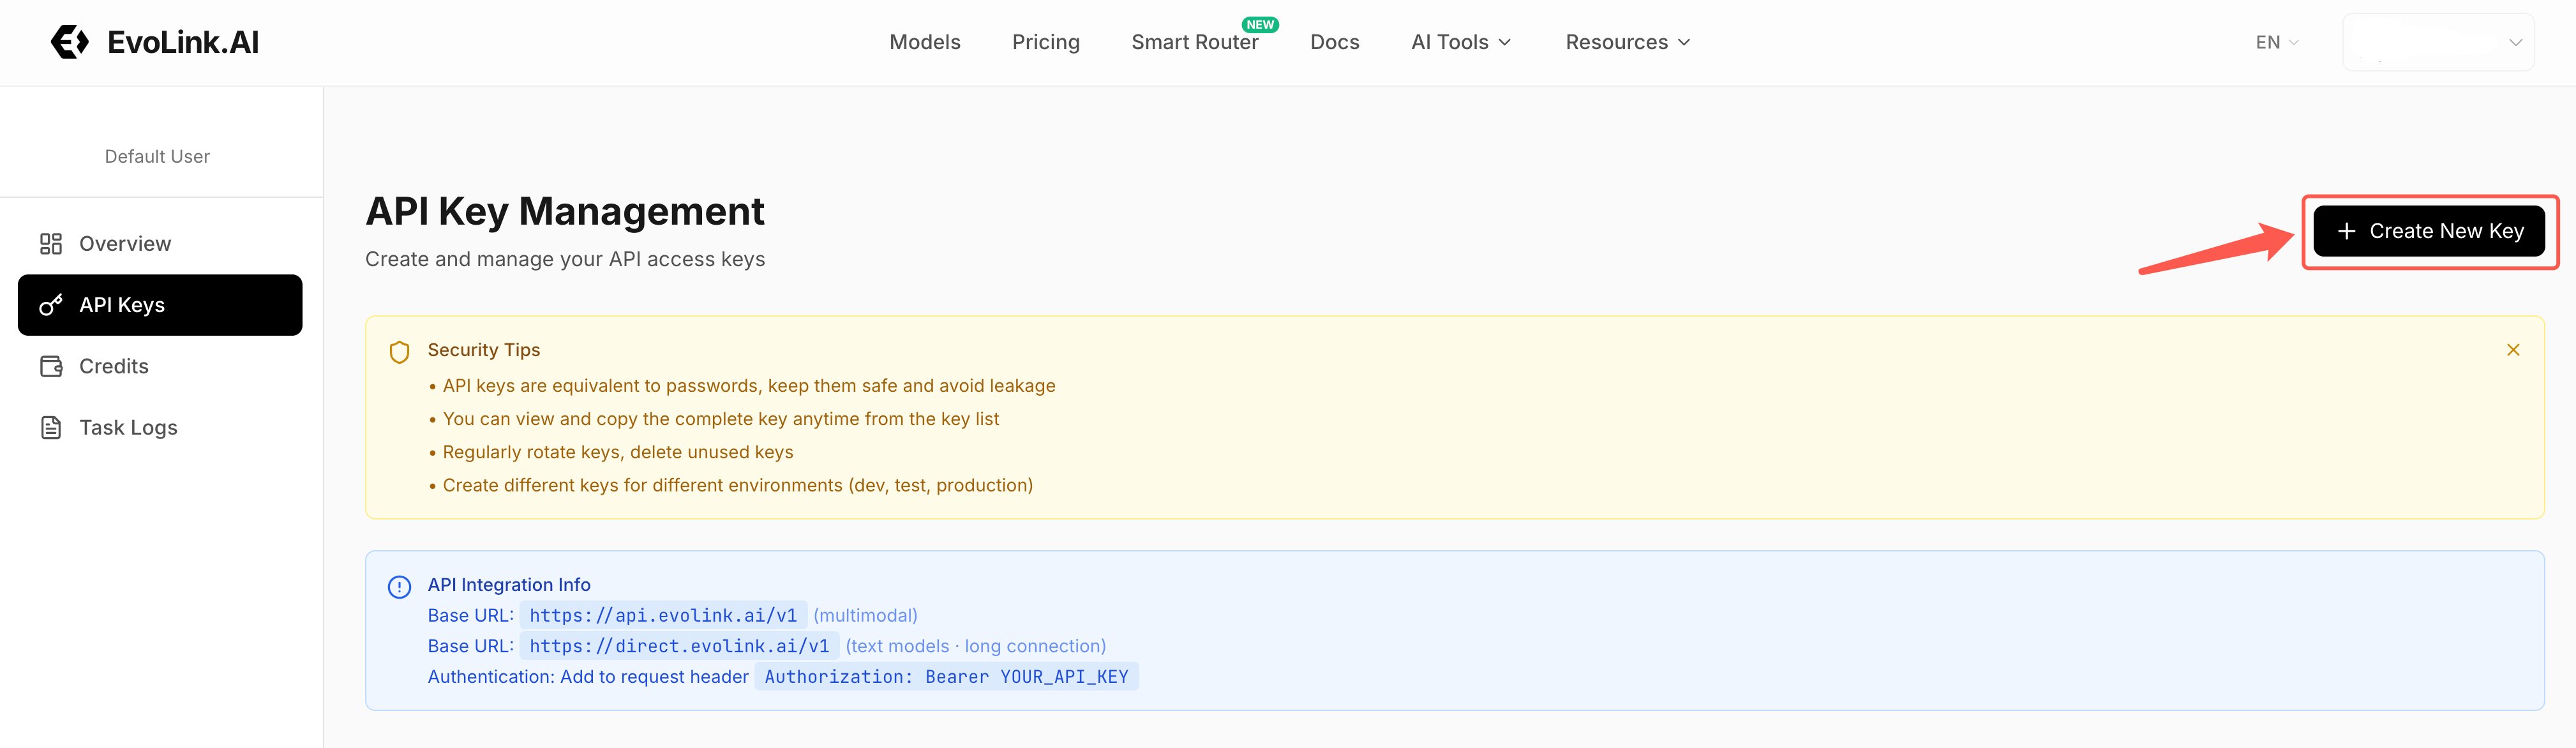
API Key Management page → Create New Key (top right) → copy the generated key
Make sure you have credits
Generation consumes credits. Check your balance on the dashboard; per-task usage is listed in the task logs.Step 1: Install the official plugin
- Option A: ComfyUI Desktop
- Option B: aki all-in-one package
- Option C: git
- Option D: ZIP download
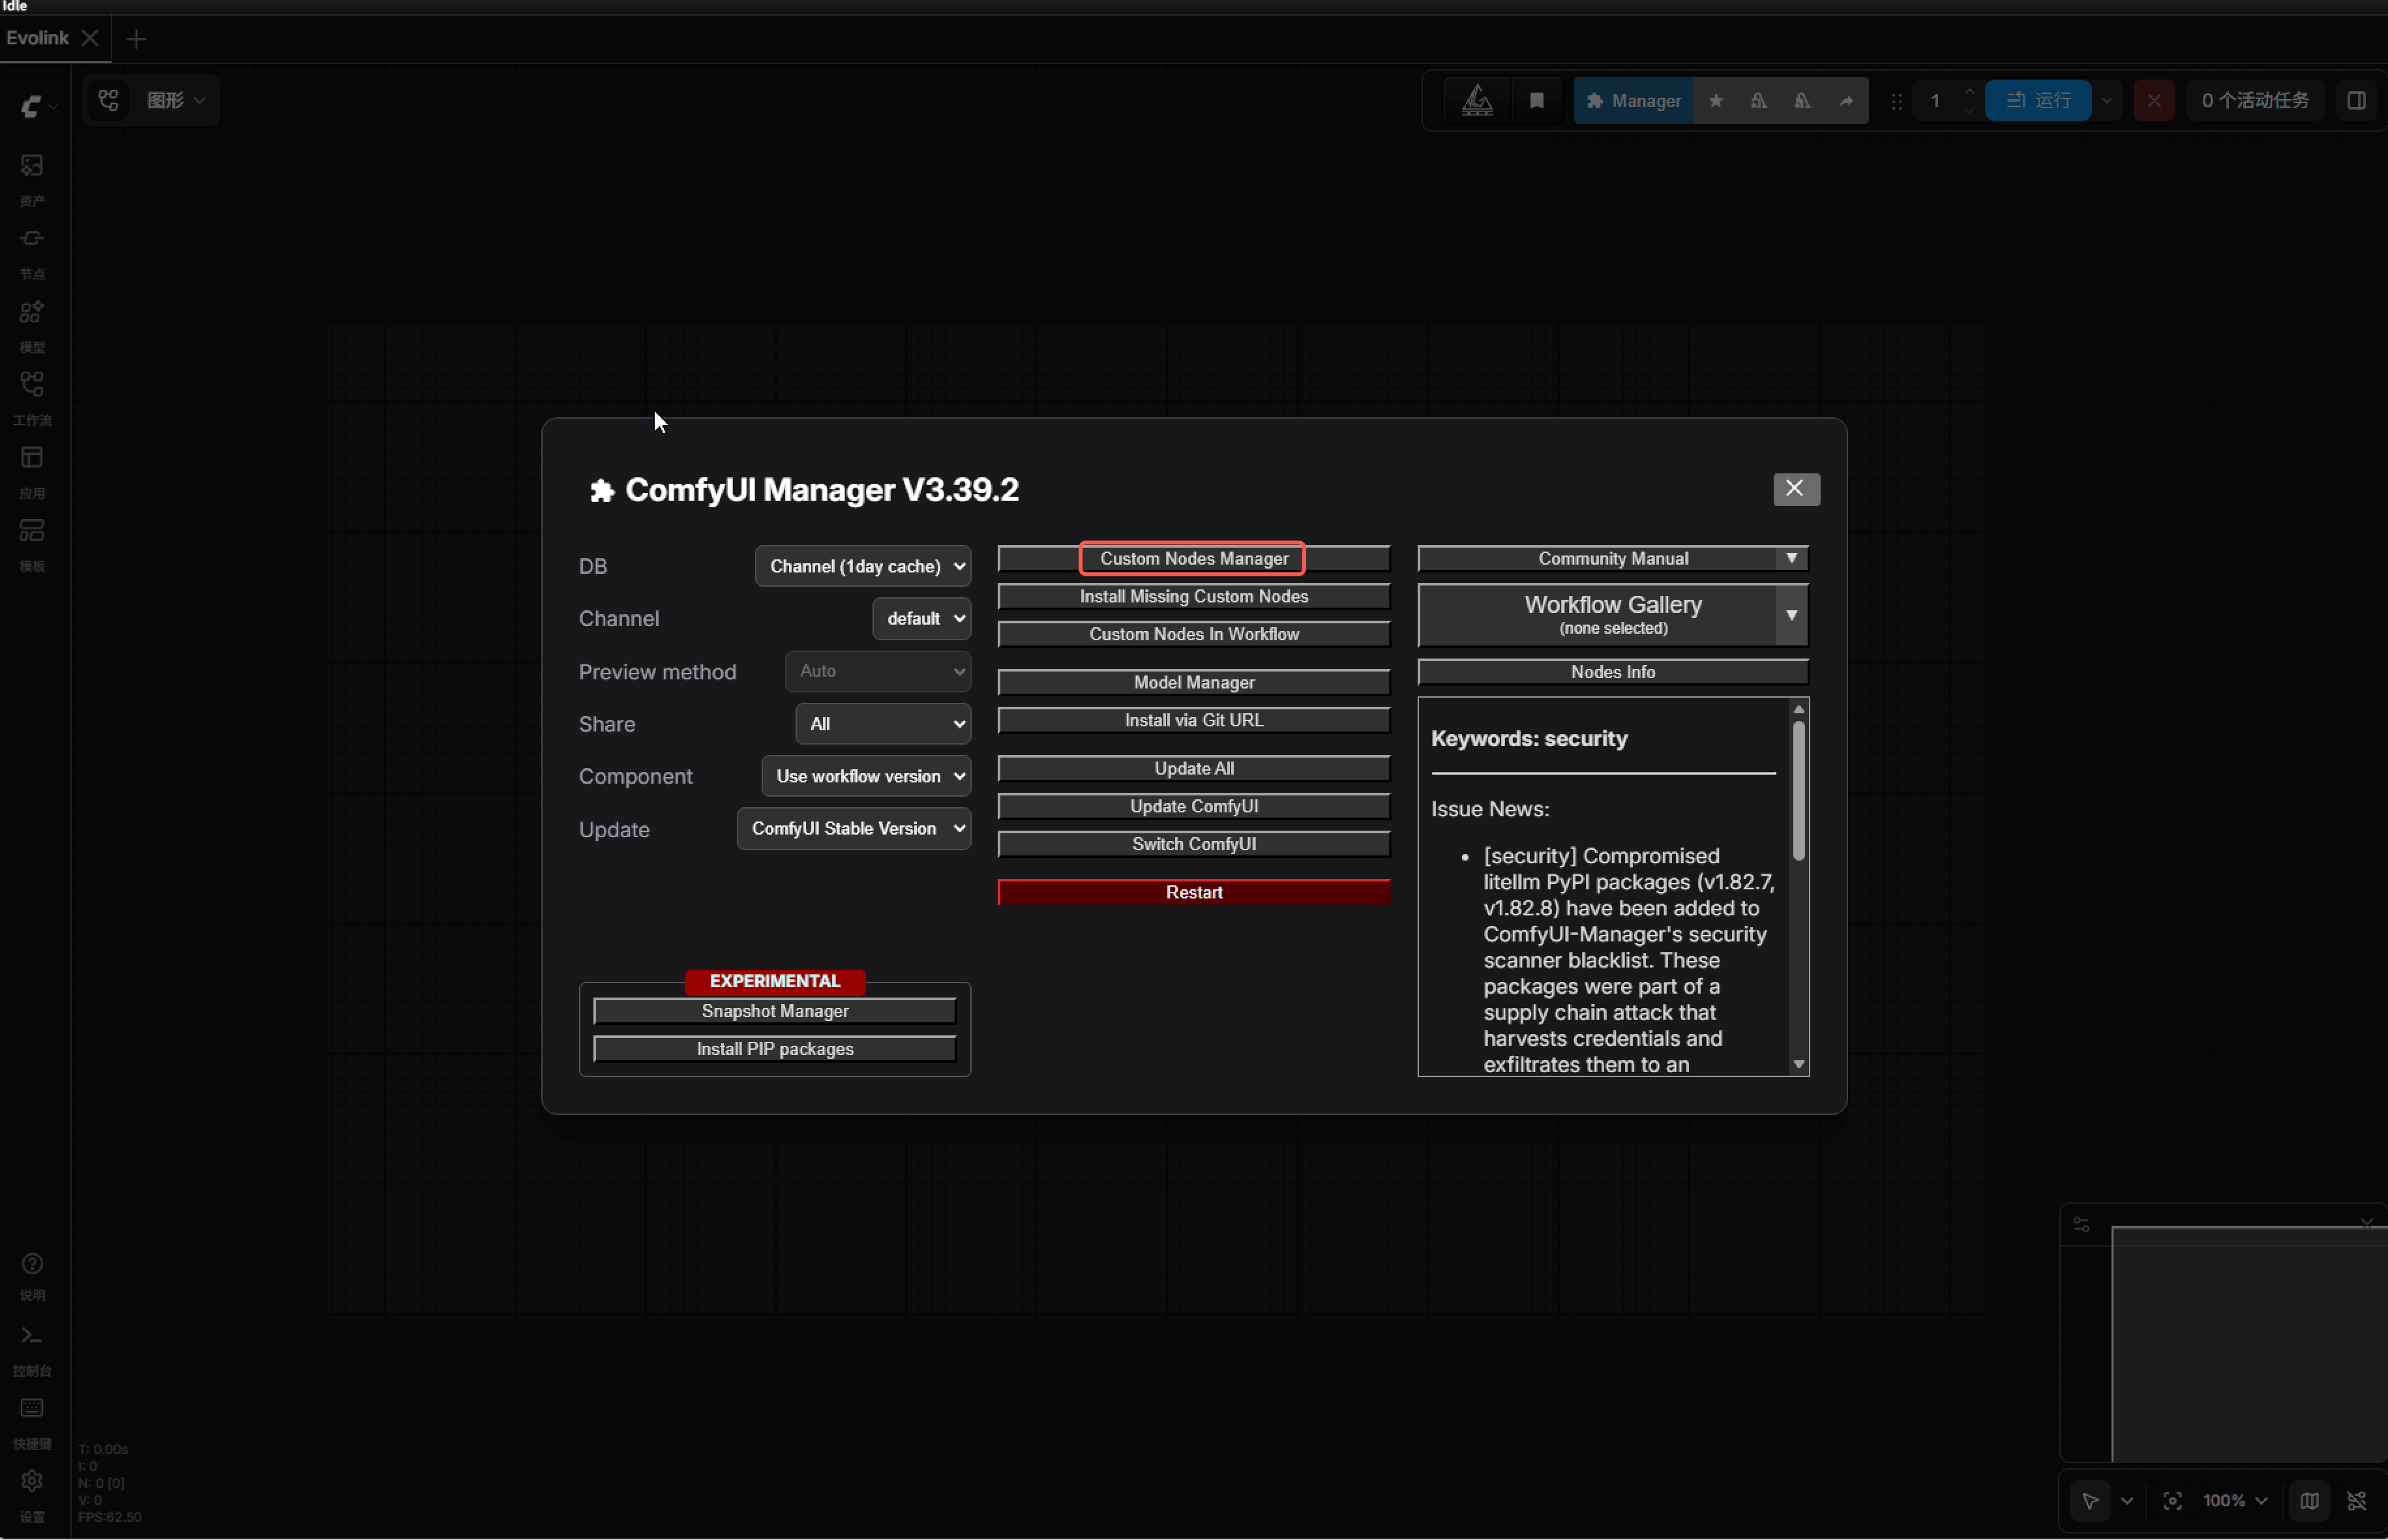
- Open ComfyUI Desktop → click Manager in the top toolbar to open the node manager
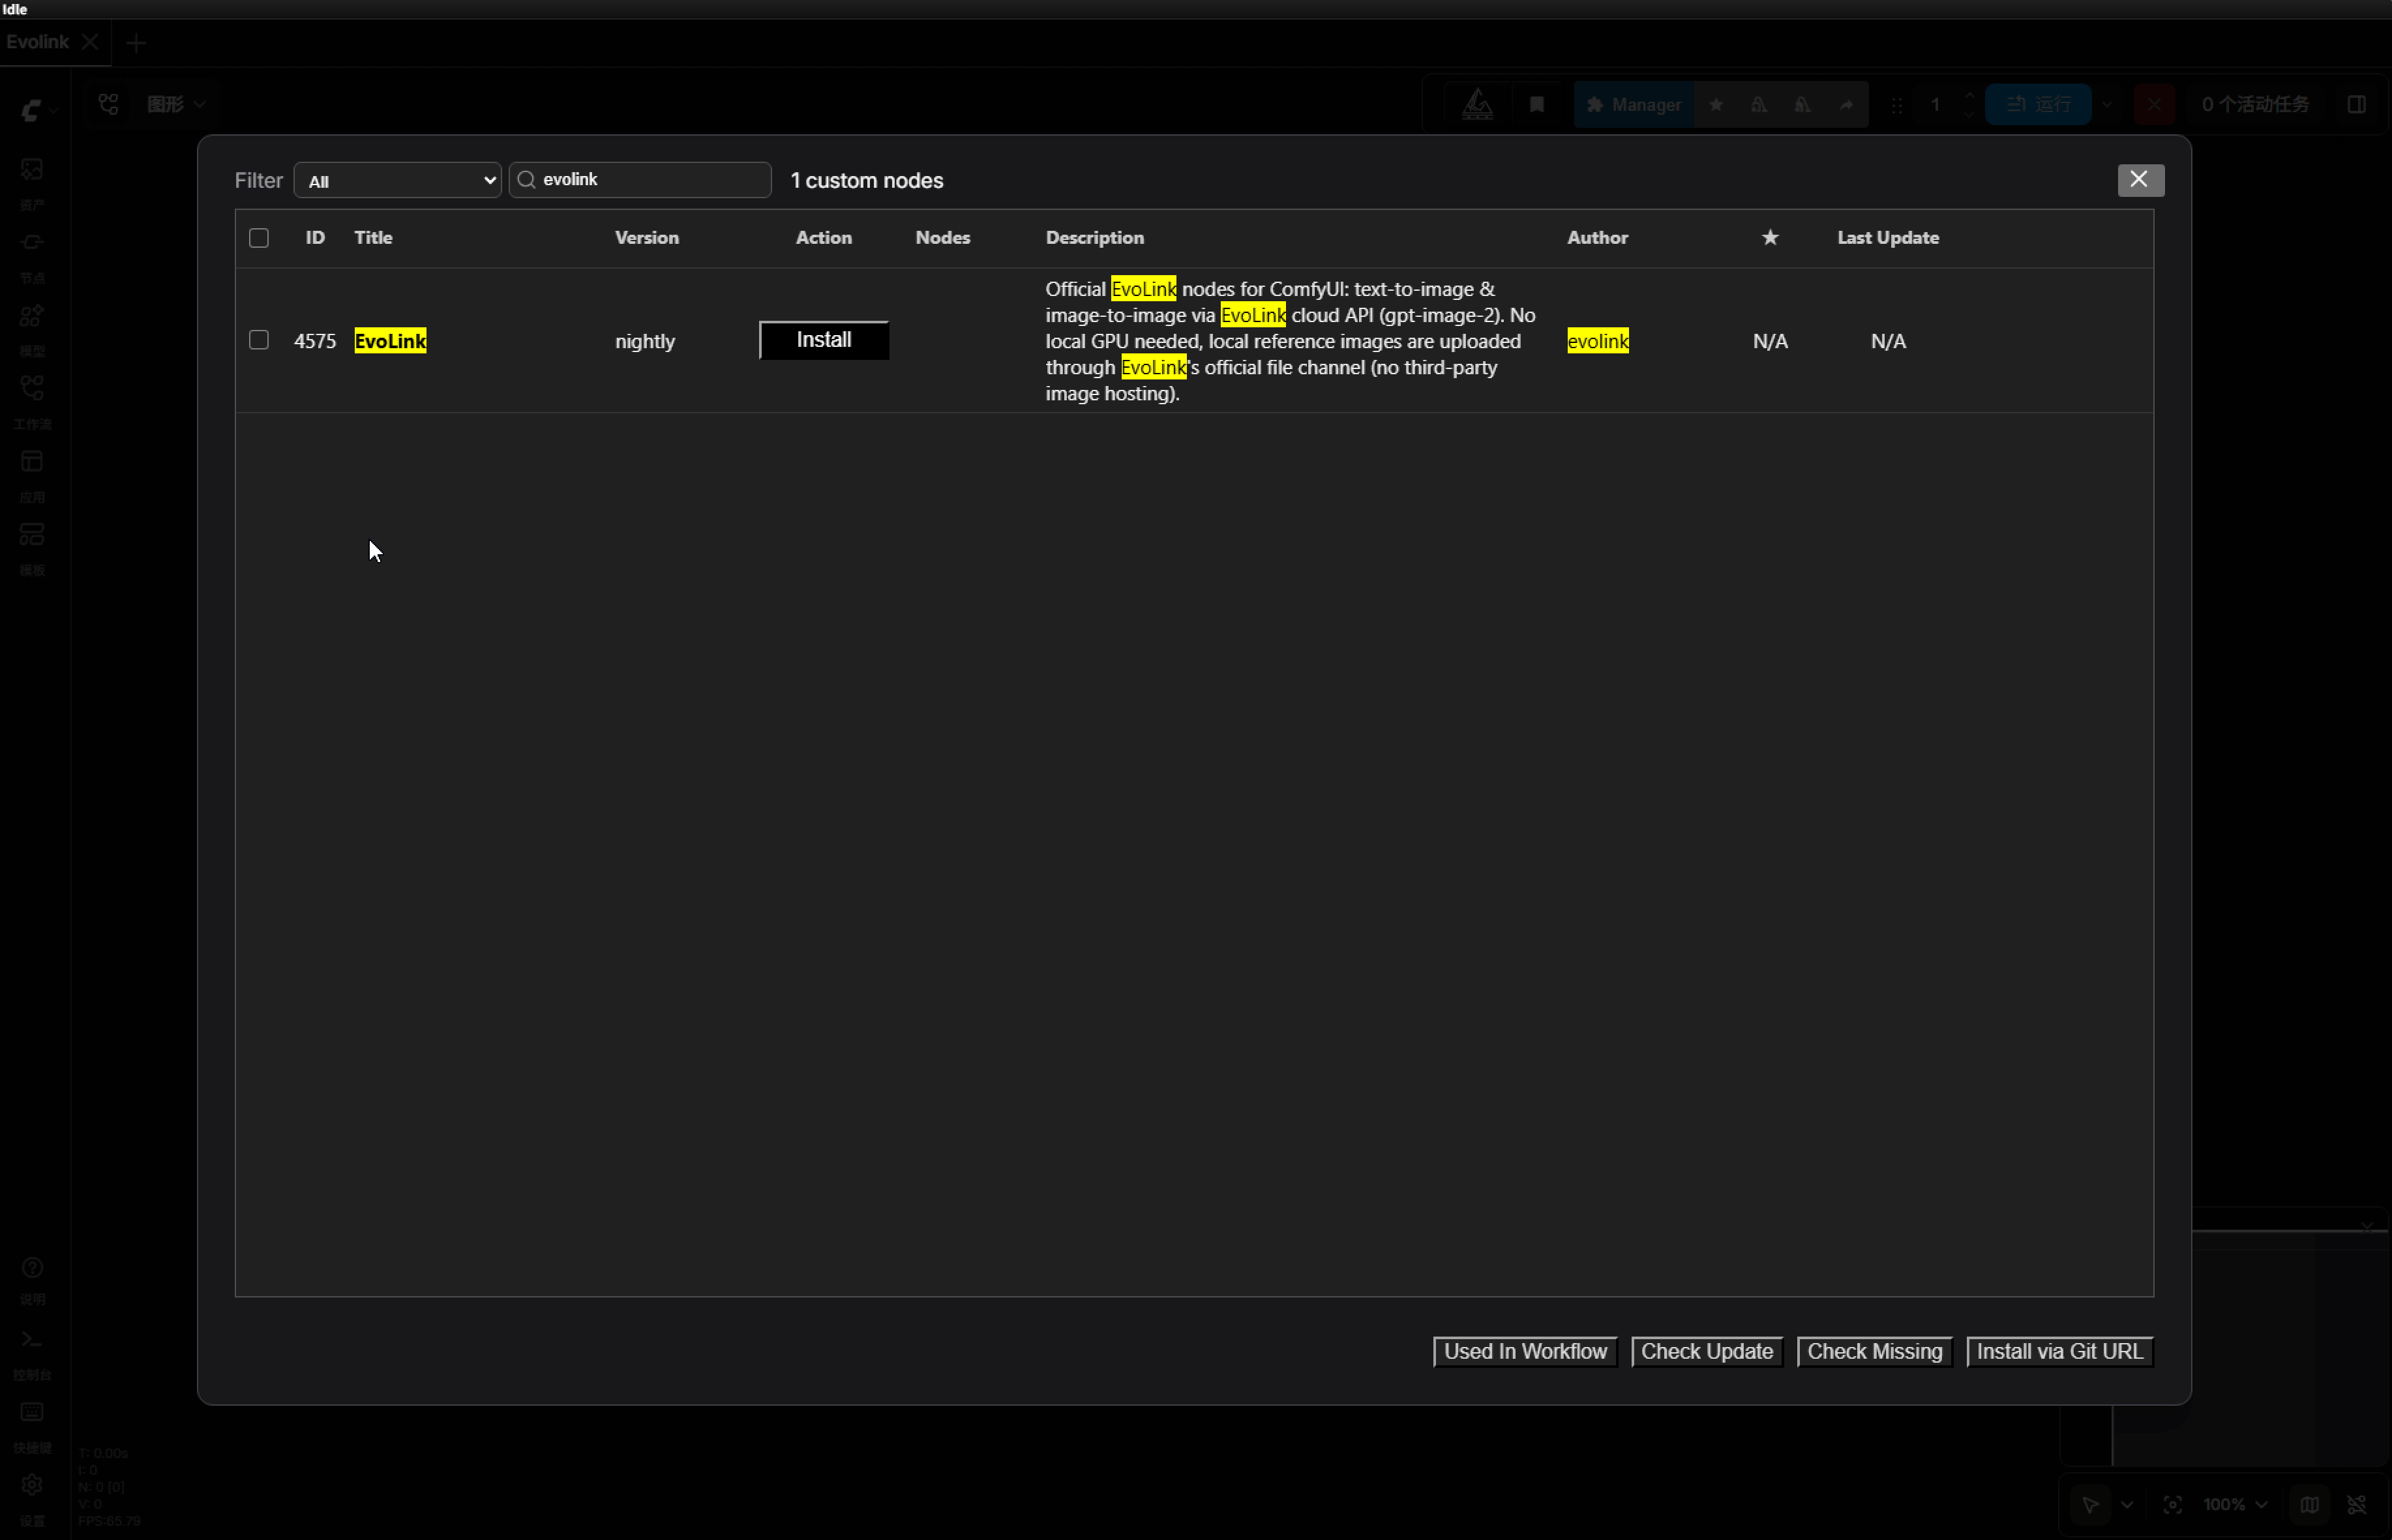
- Search
evolink→ pick the EvoLink entry whose Created By is evolink → click Install - Restart ComfyUI when prompted
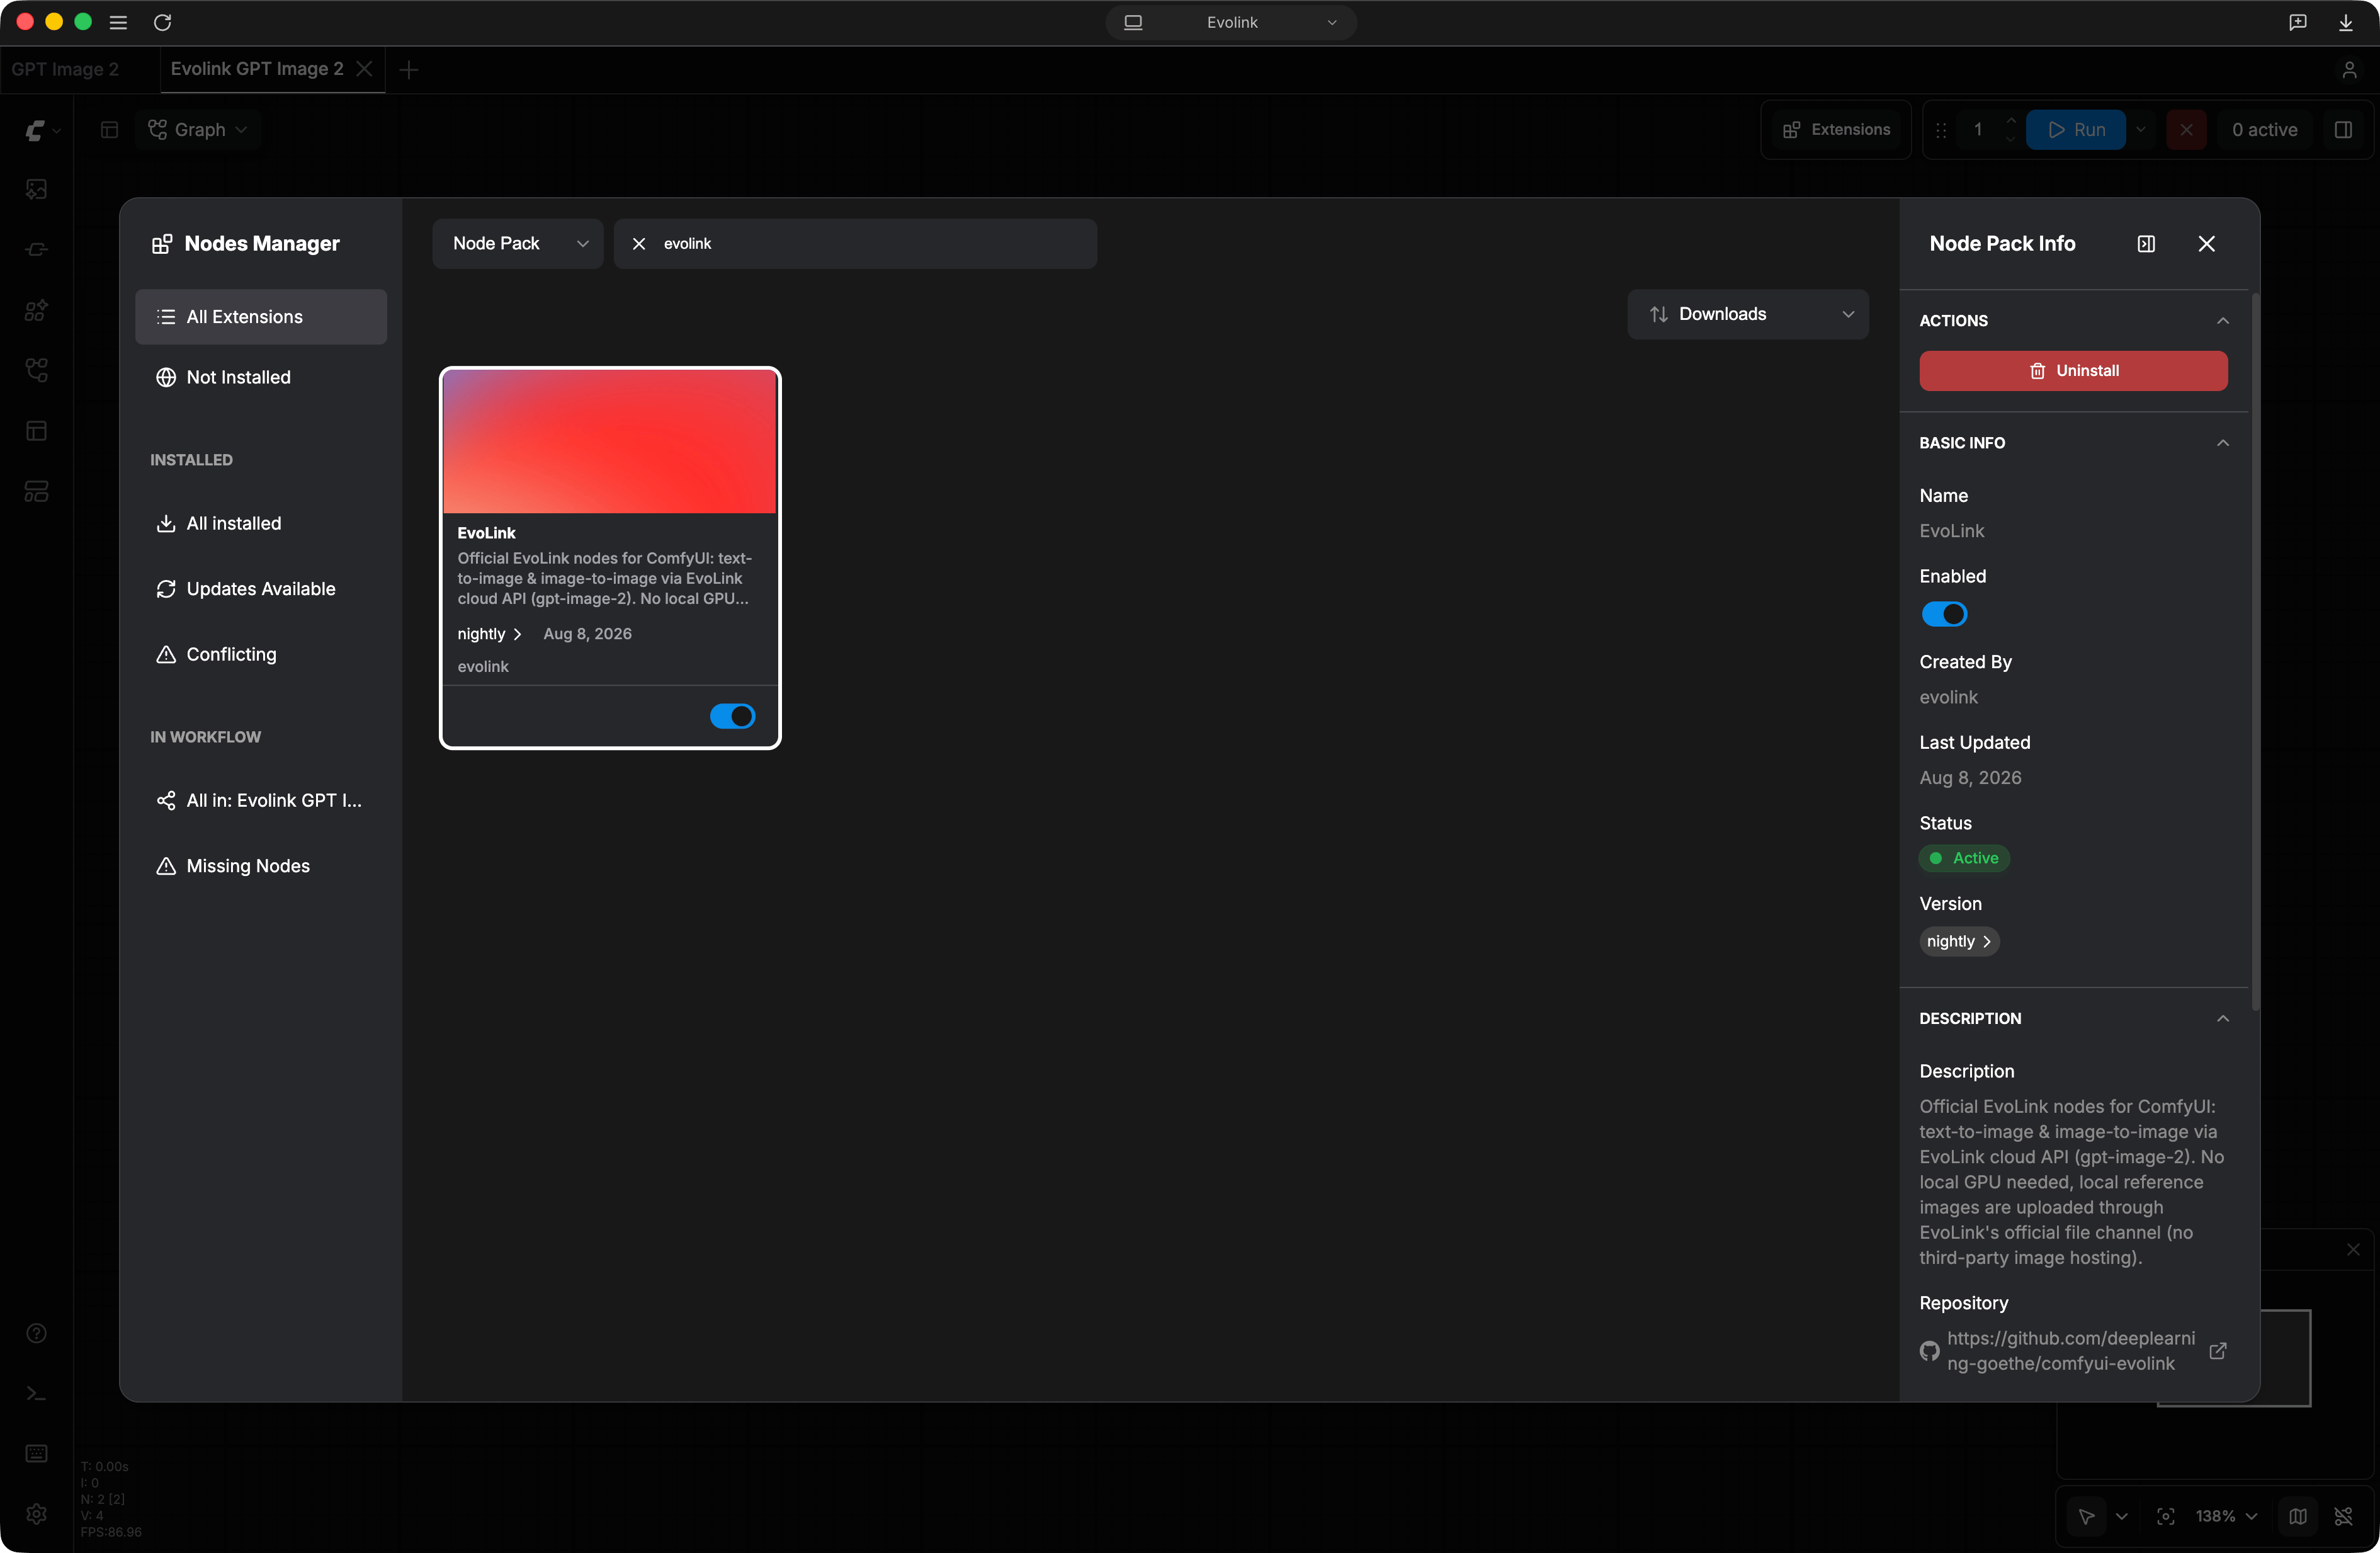
Search EvoLink in Desktop's node manager → Install (shown: the pack info panel after installing)
requests (usually bundled with ComfyUI already).
Option A / B install fails with only custom nodes from the default channel can be installed? Expand for the fix
Option A / B install fails with only custom nodes from the default channel can be installed? Expand for the fix
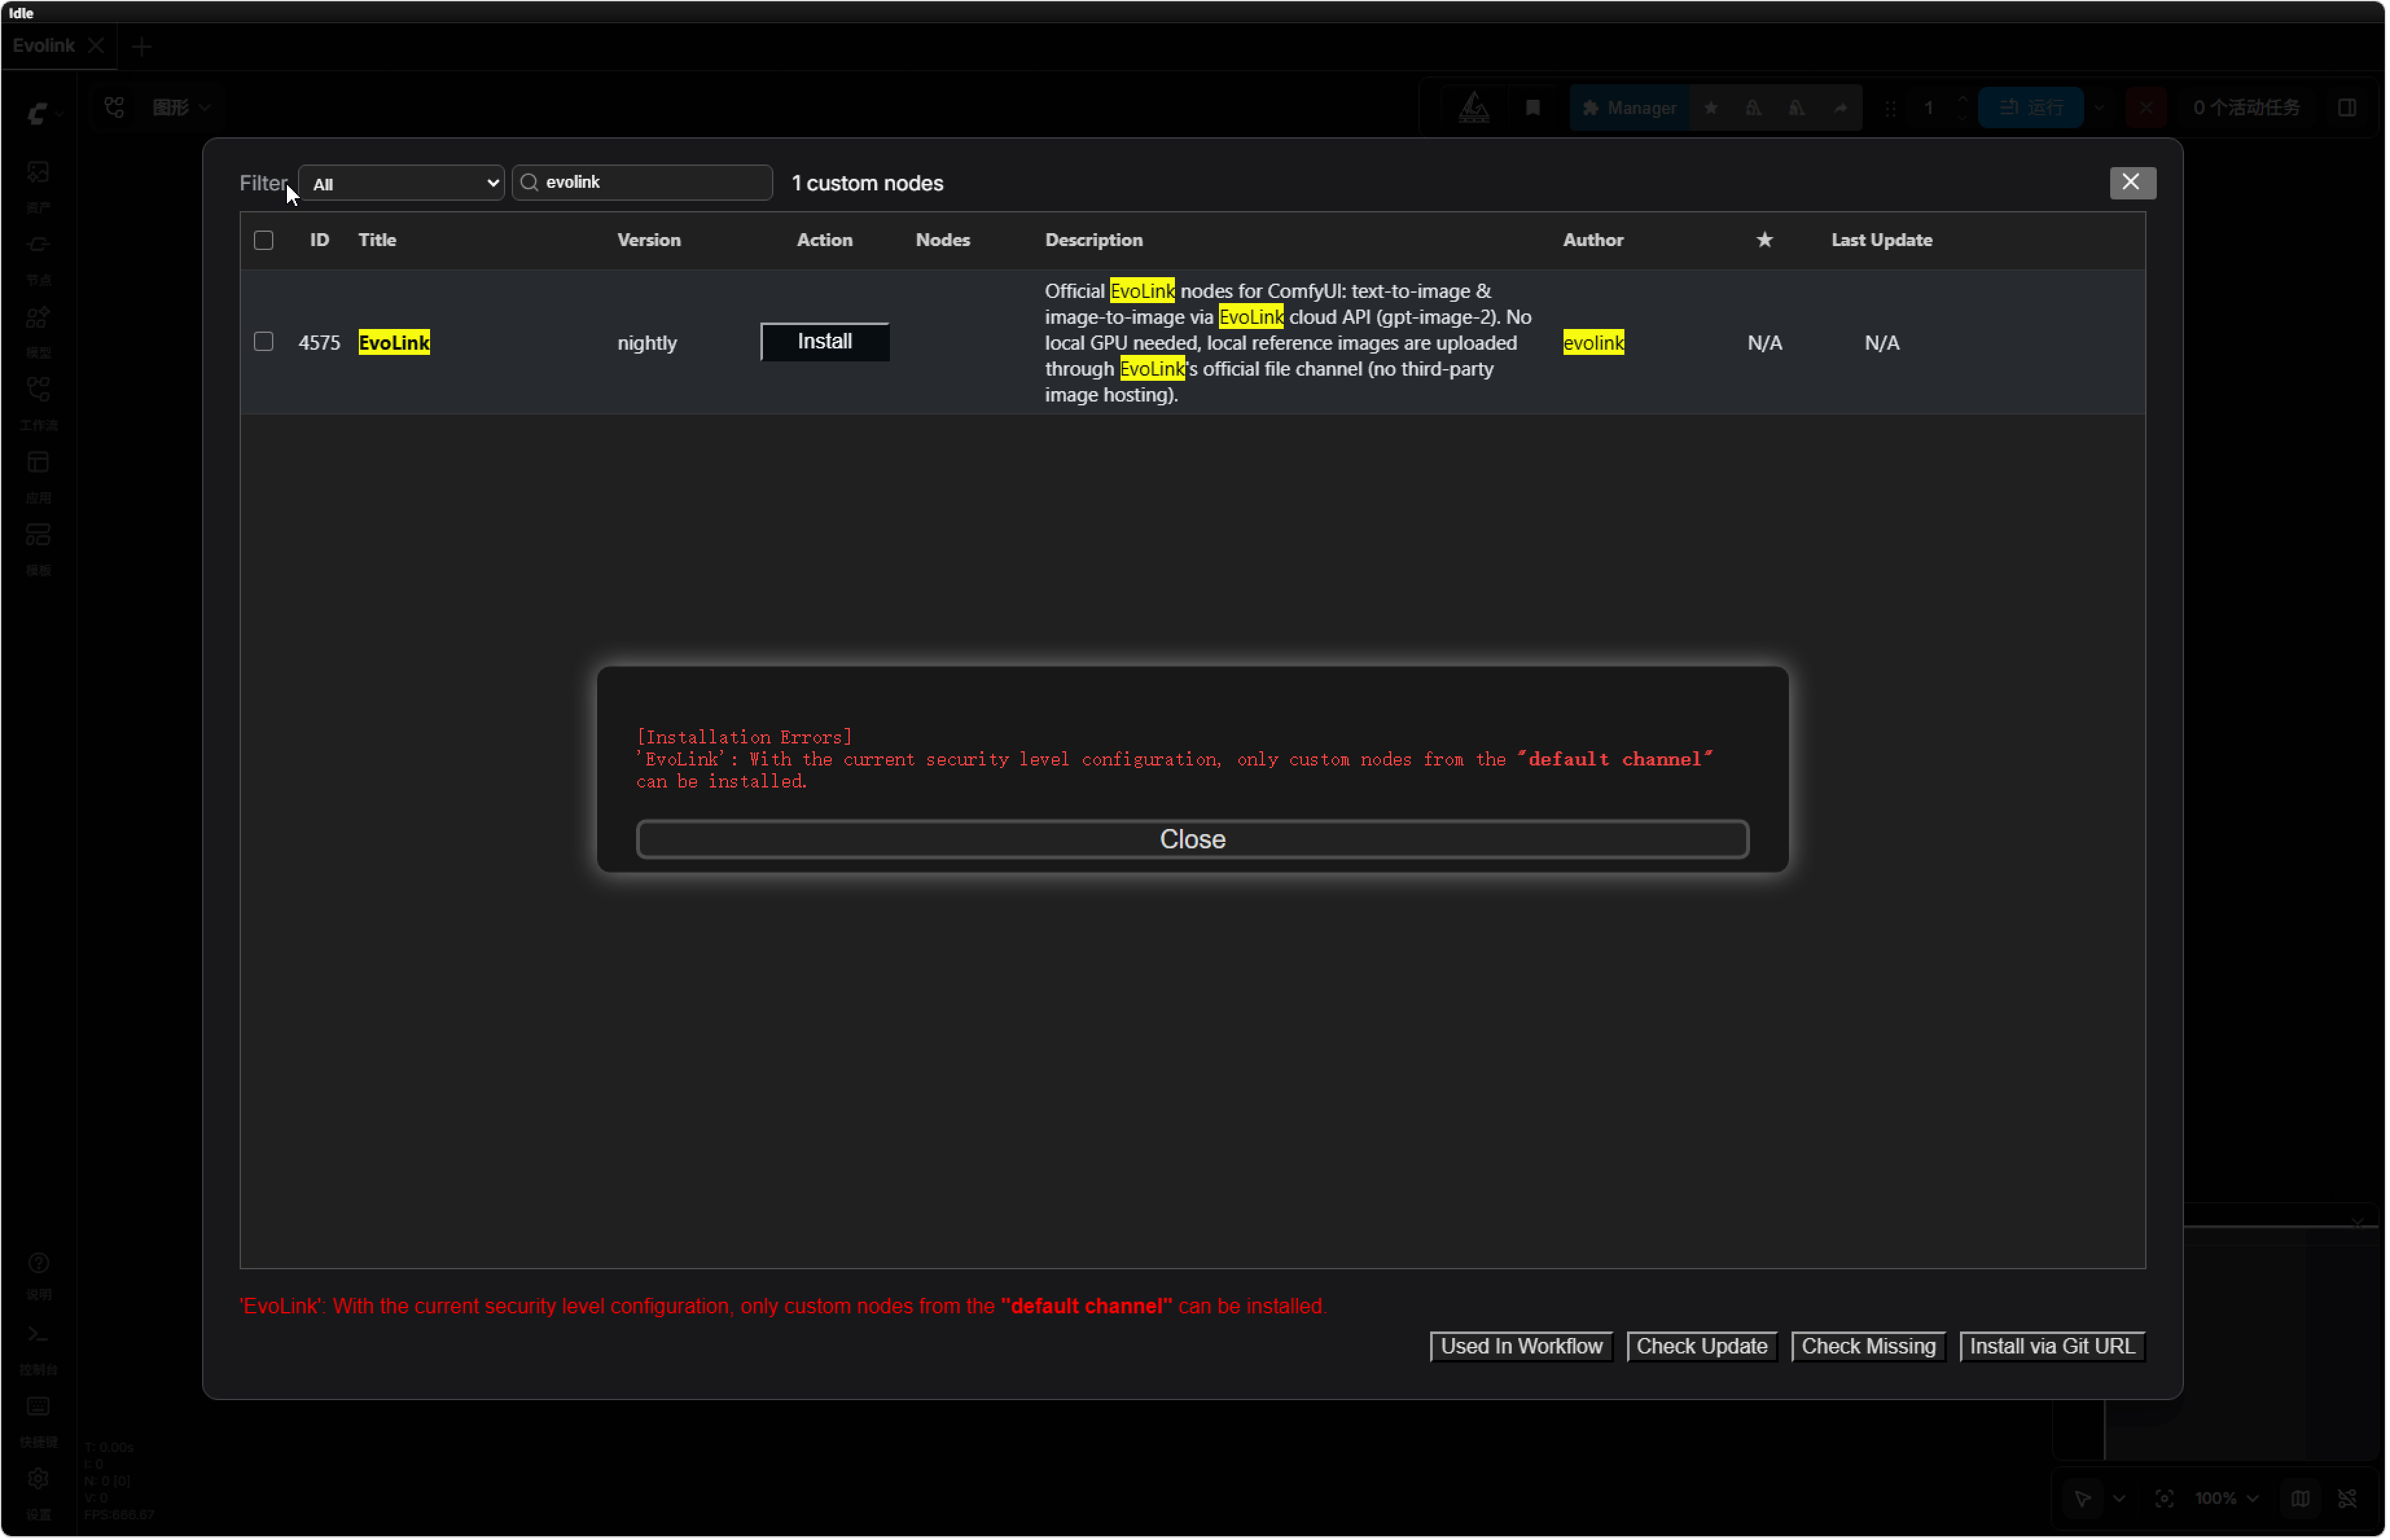
The error: blocked by the current security level configuration
- aki all-in-one package: launcher → Terminate process
- Official Desktop / portable / manual installs: quit the app completely, including the console window
config.iniFind it per your install type (or just search for config.ini inside your ComfyUI folder and pick the one whose path contains manager):security_level line and change normal to weak: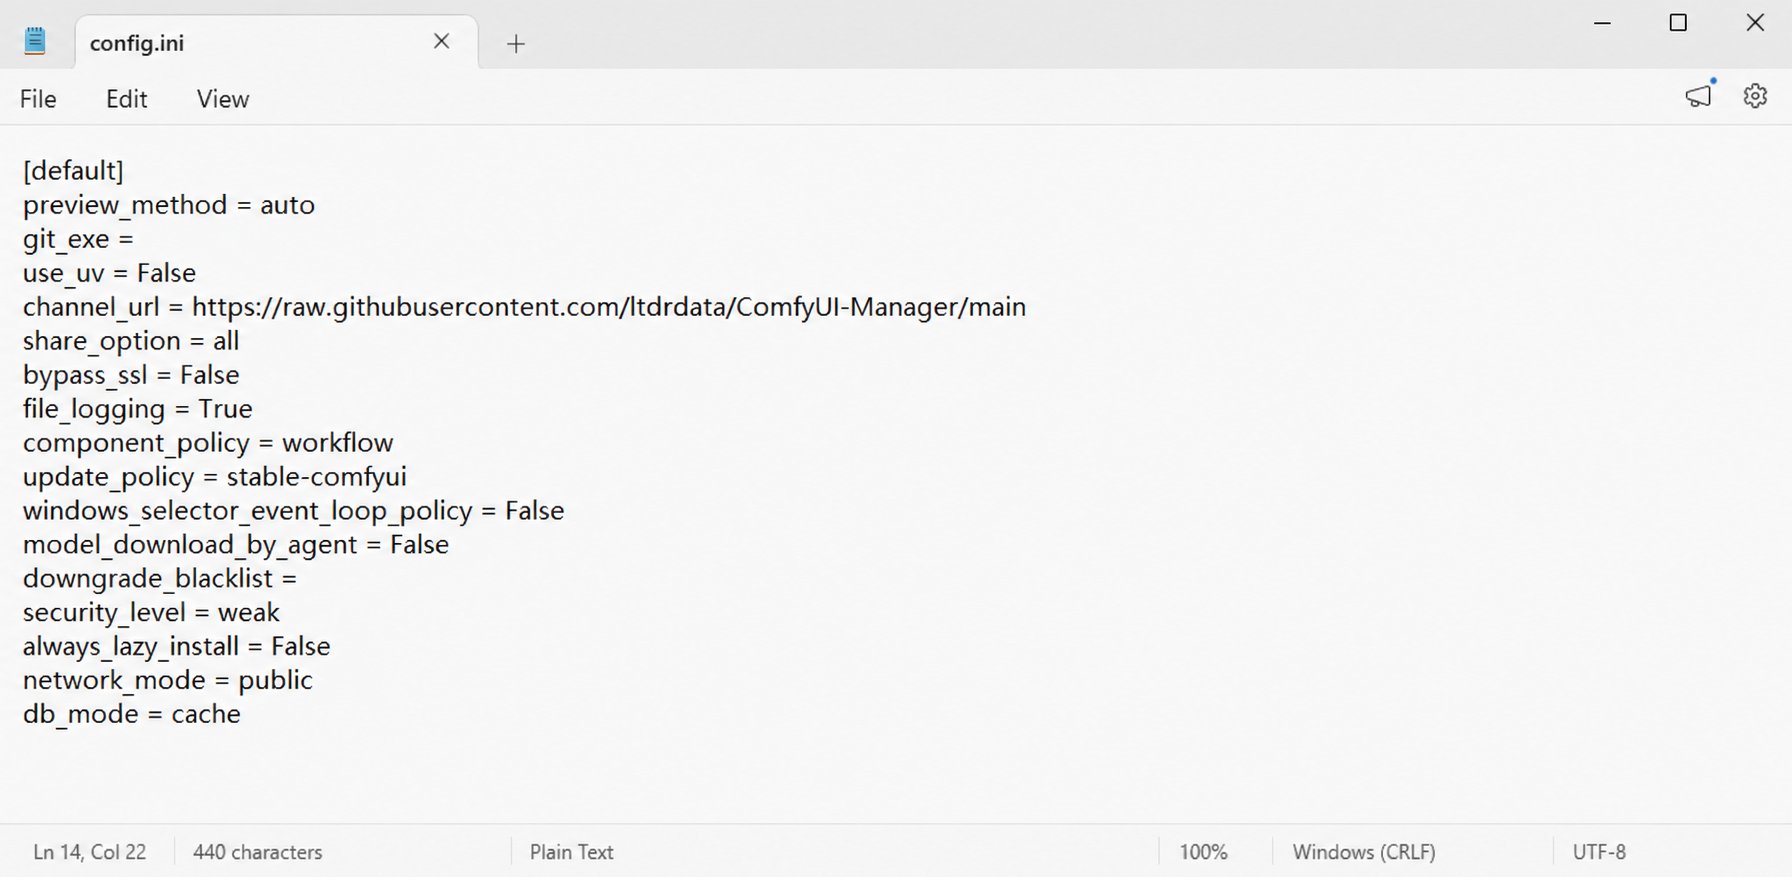
Change the security_level value to weak and save (leave every other line untouched)
evolink → Install. Ignore the Neither 'pip' nor 'uv'... message if it appears. Once you see Restart Required, fully restart once more and refresh the browser.Step 4: Verify, then restore the security level- Confirm the nodes load per Verify the install below
- Change
security_levelback tonormalafter installing (repeat steps 1–2) to restore the Manager’s default protection
Verify the install
After a full restart and a browser refresh, double-click the empty canvas → searchevolink. If you see both EvoLink GPT Image 2 (Official) and EvoLink Upload Image (Official), the install succeeded:
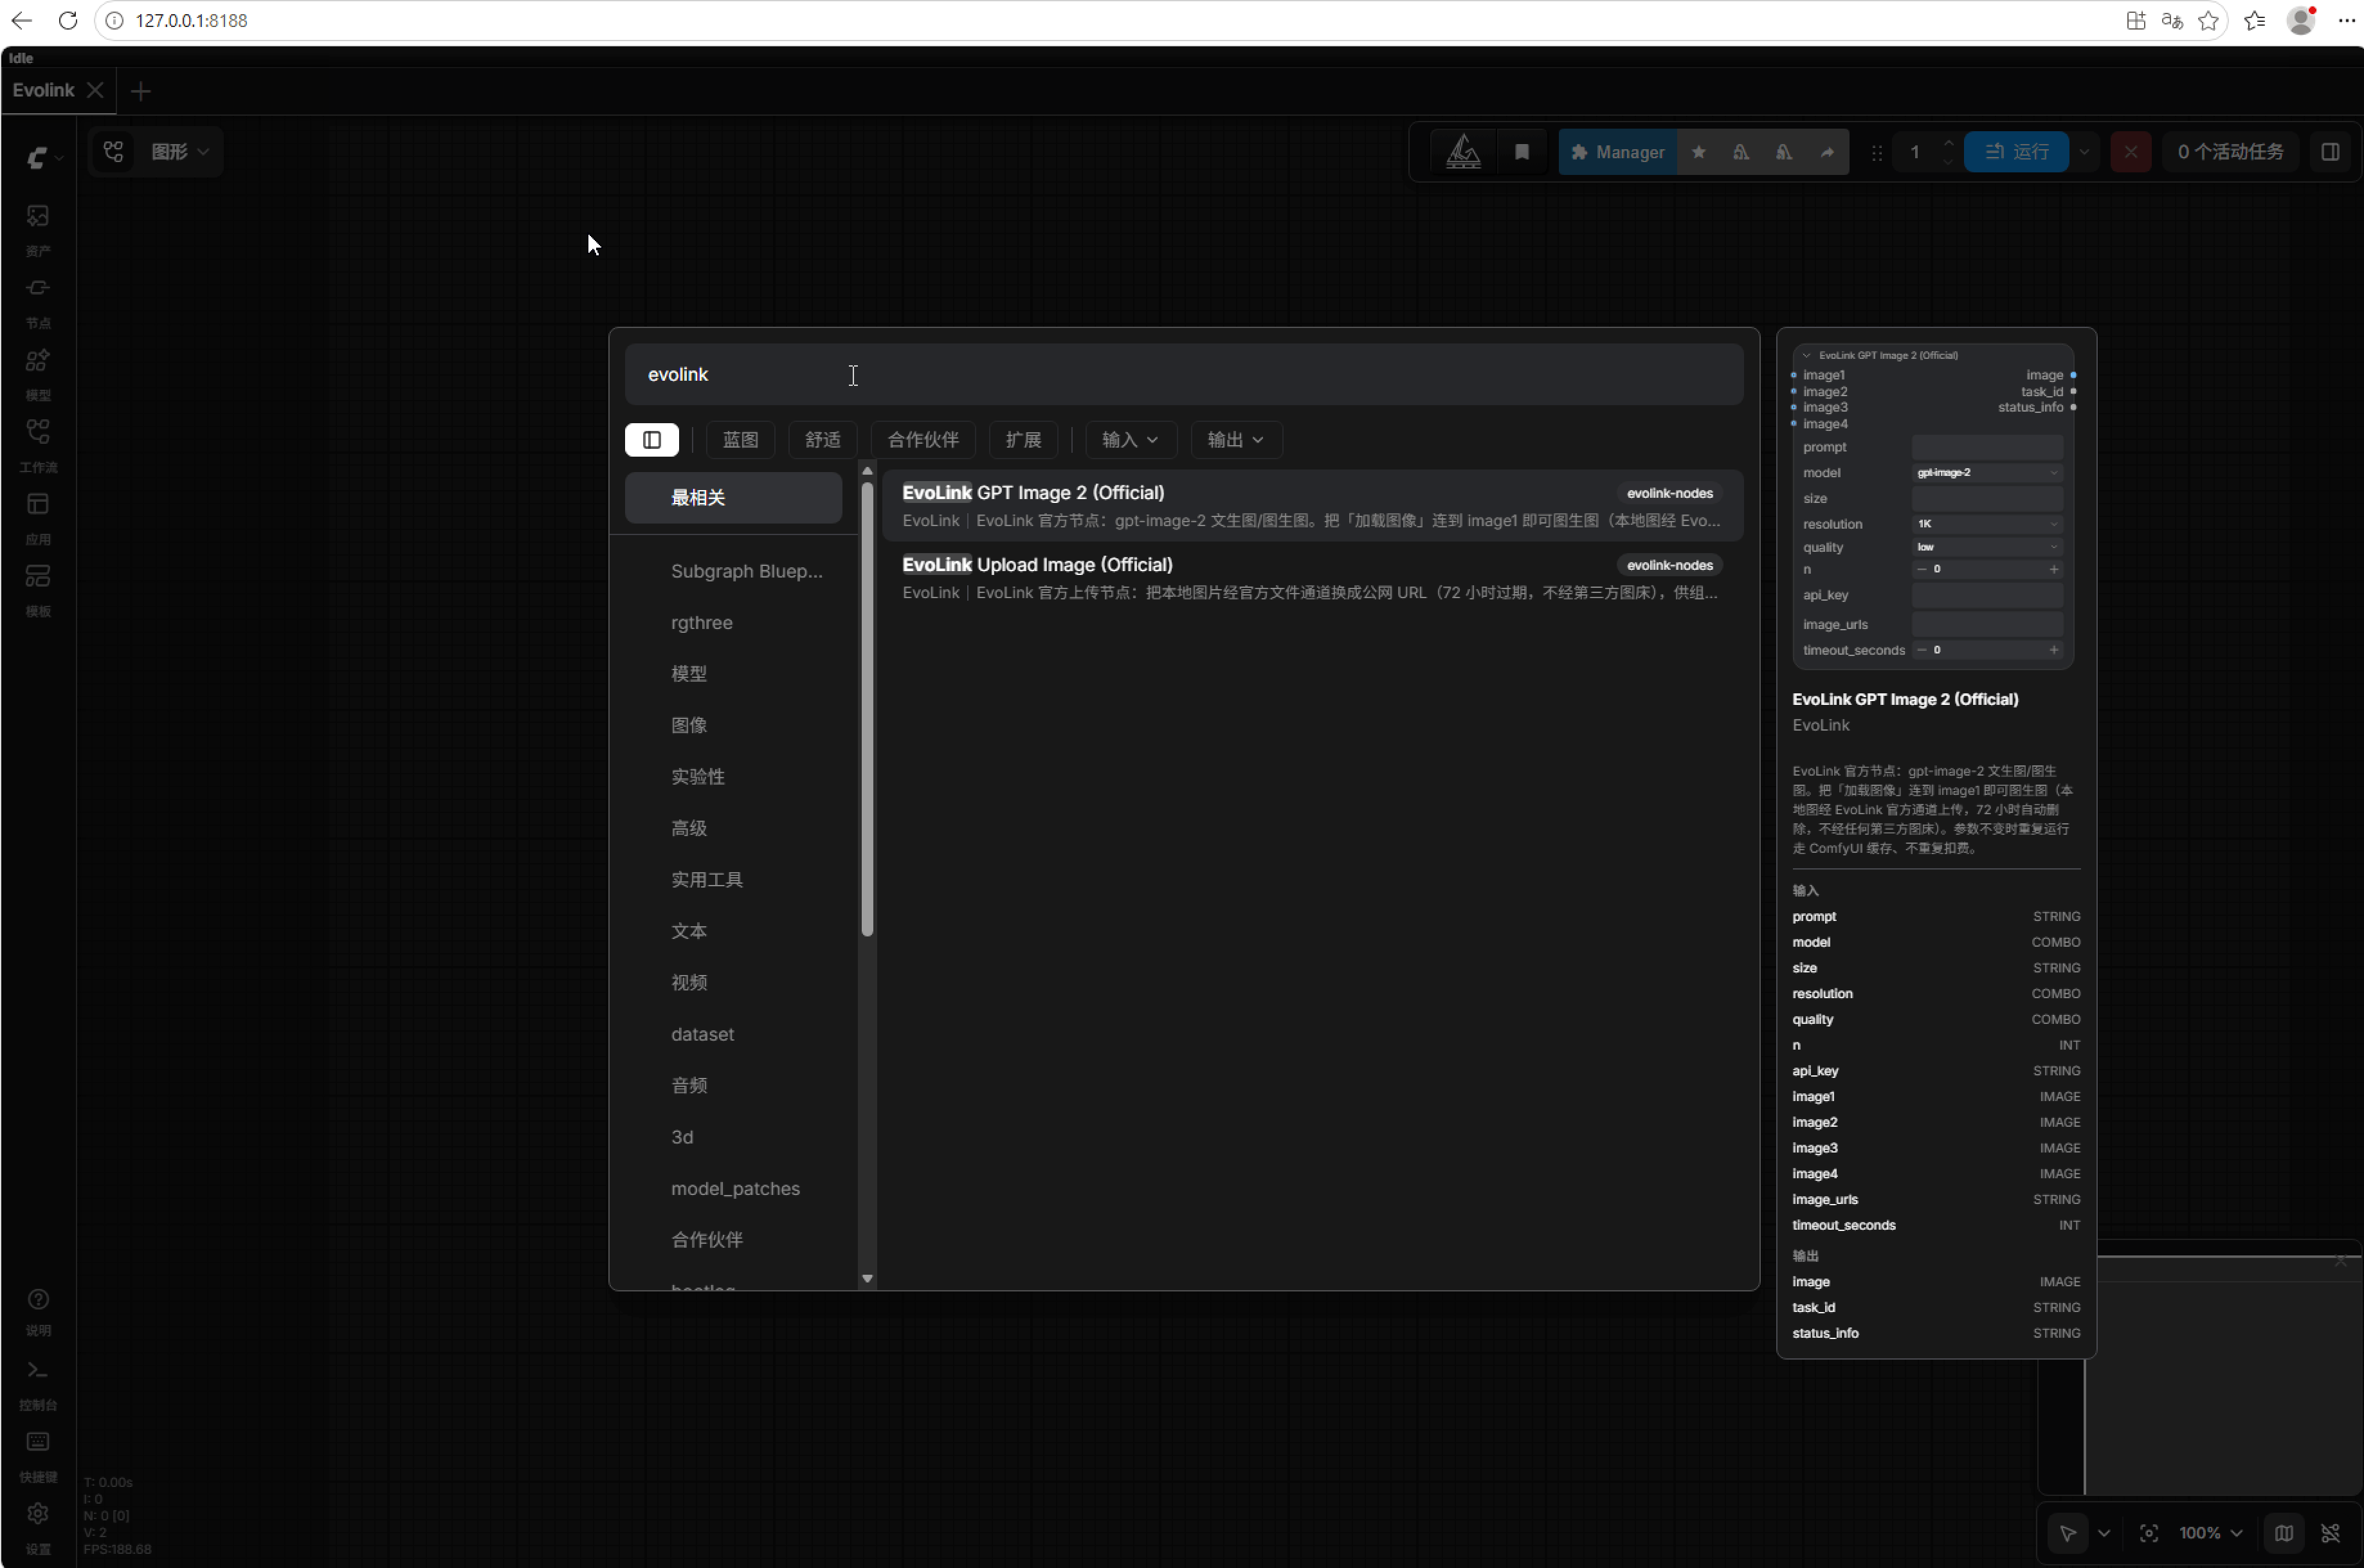
Double-click the canvas and search evolink — both official nodes appear (screenshot from the aki package)
Step 2: Your first image (text-to-image, 5 minutes)
- Double-click the empty canvas (or right-click → Add Node) → search
EvoLink→ add EvoLink GPT Image 2 (Official) - Fill in:
api_key: paste yoursk-key. First time only — it is saved to a local config file after the first run; leave the field empty afterwards (and clear it before sharing workflows)prompt: your description, e.g.a shiba inu wearing a red scarf sitting in the snow, flat illustration- Keep the other defaults (
quality=lowis the cheapest for testing)
- Connect a display node (required): drag from the
imageoutput dot to empty canvas and pick Preview Image; add a Save Image node too if you want files written to ComfyUI’soutputfolder
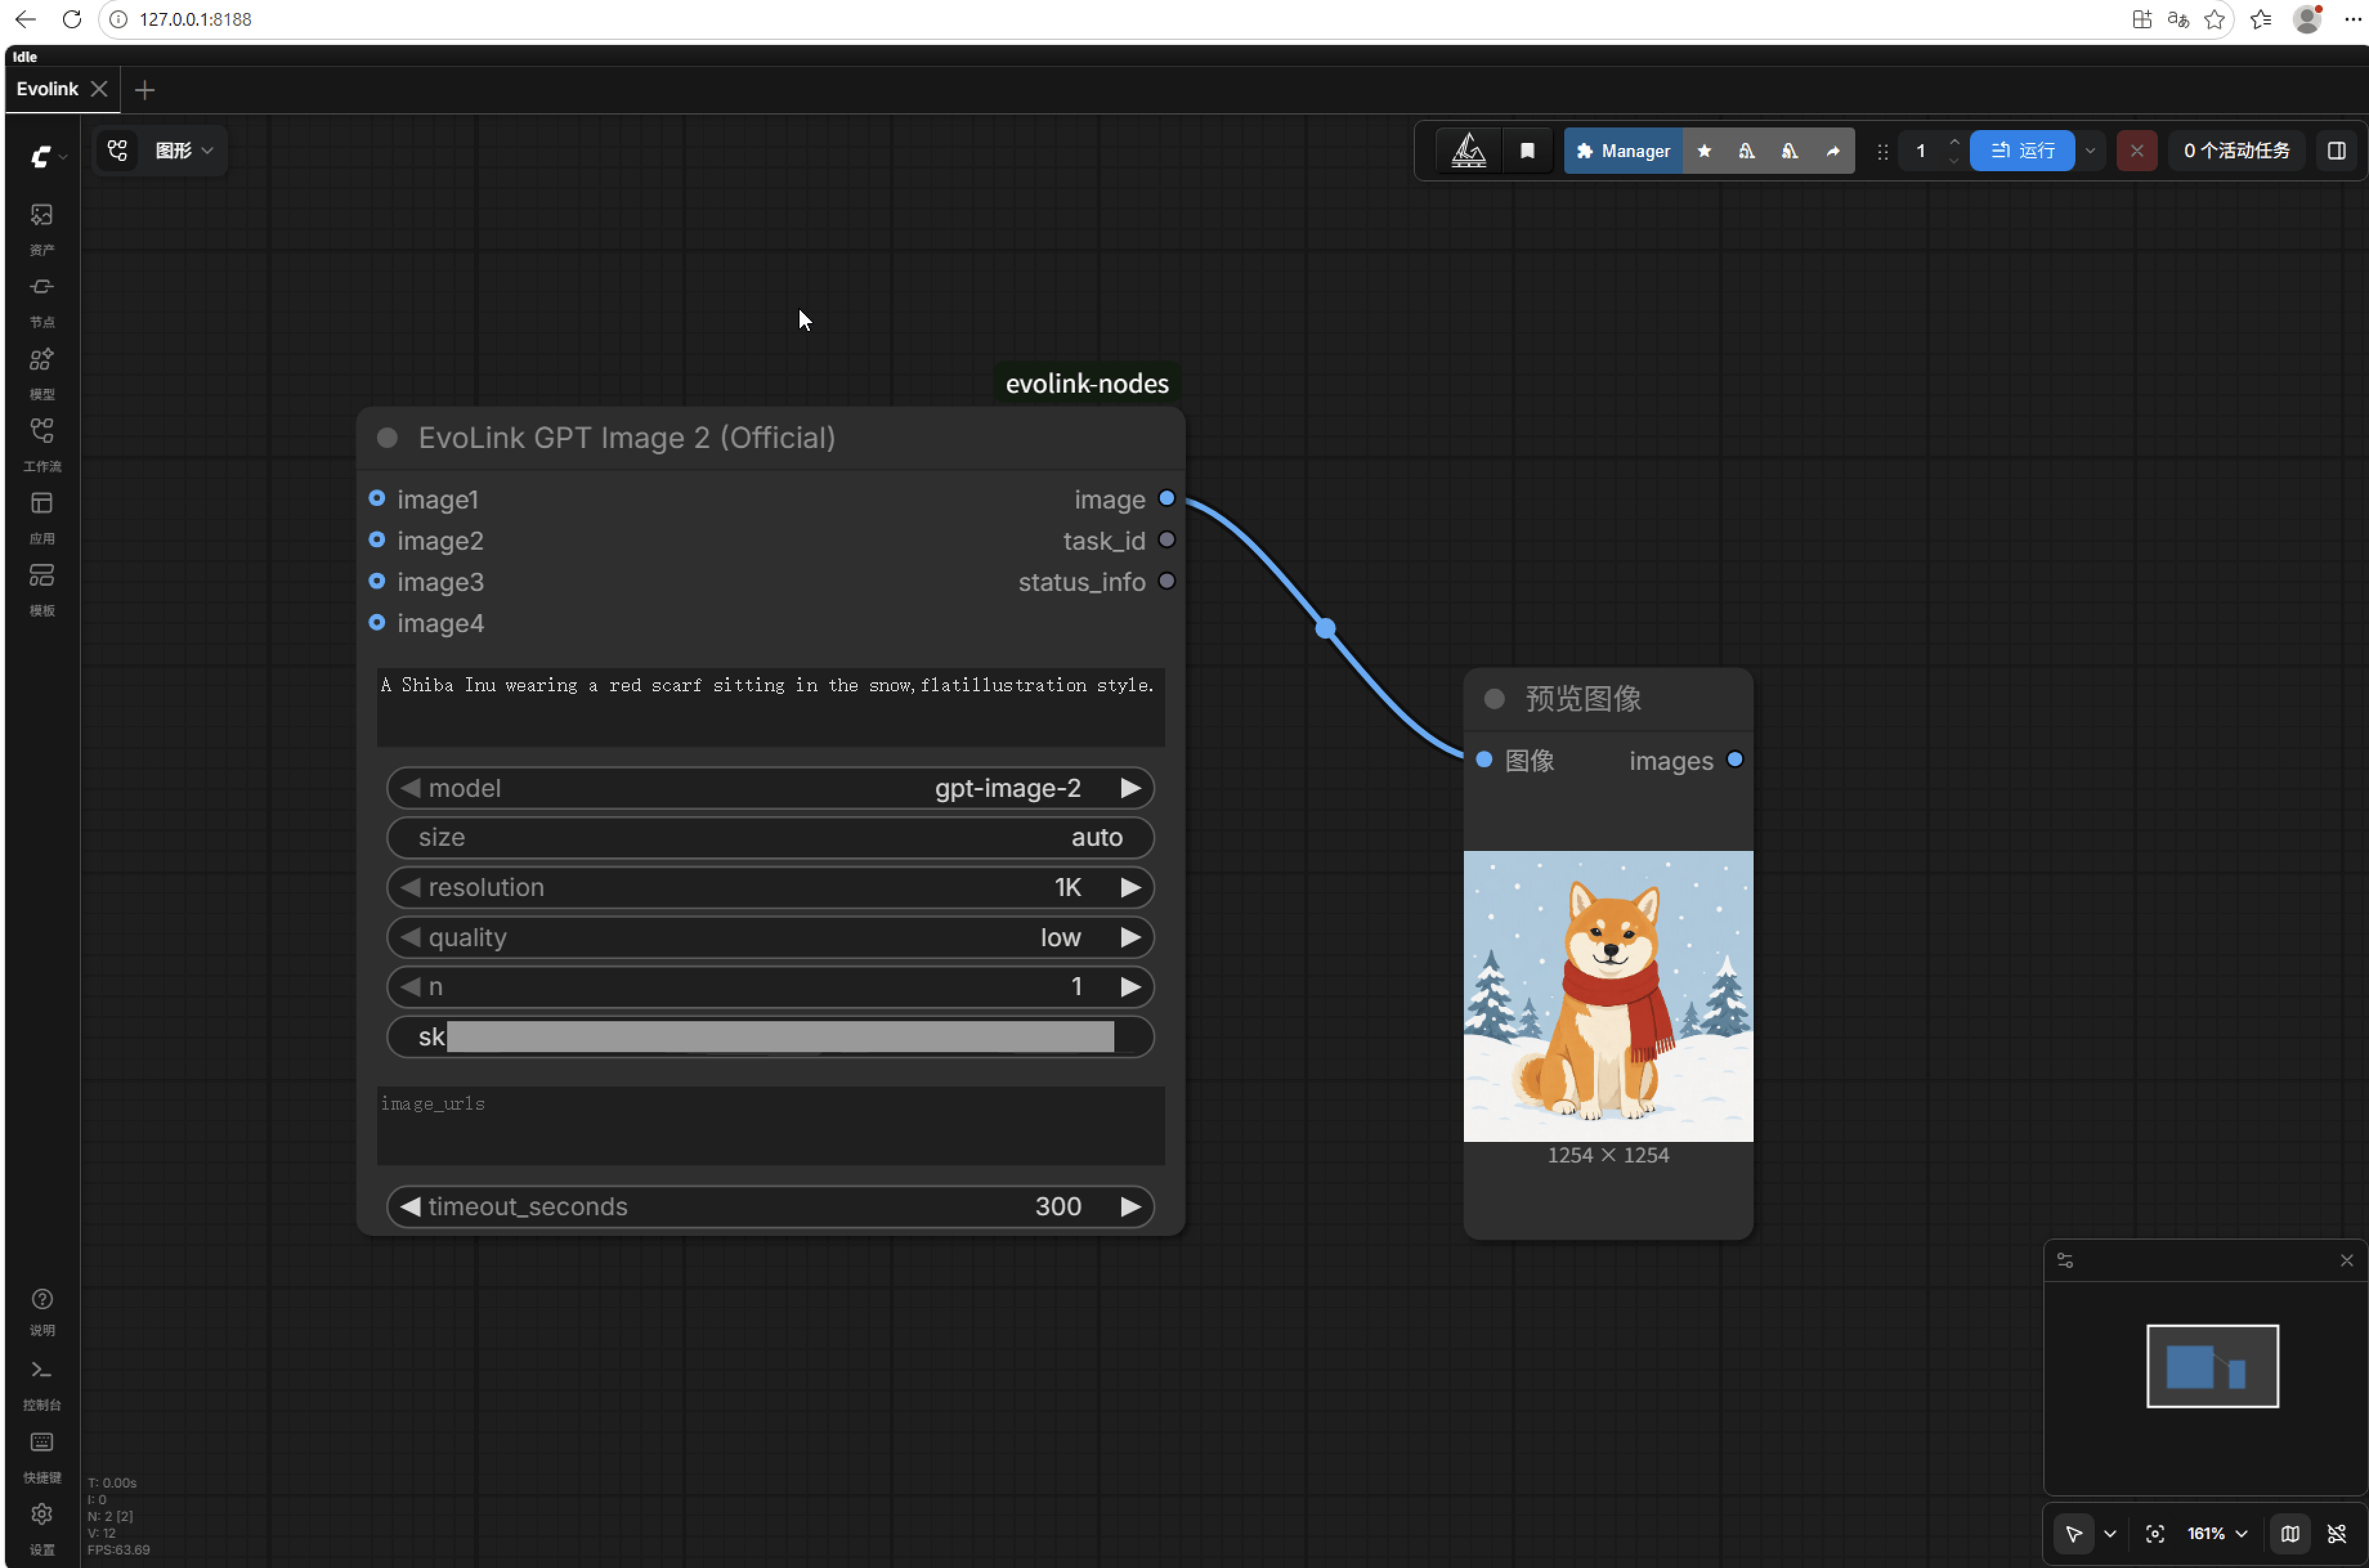
The complete text-to-image workflow: parameters filled, image wired to Preview Image (api_key redacted — leave it empty after first use)
- Hit Queue Prompt. The node submits the task, polls with a live progress bar, and fetches the result, shown right in the Preview node.
Step 3: Image-to-image (3 steps)
- Add a Load Image node and pick your local picture
- Connect its image output to the EvoLink node’s
image1socket - Describe the edit in
prompt→ run
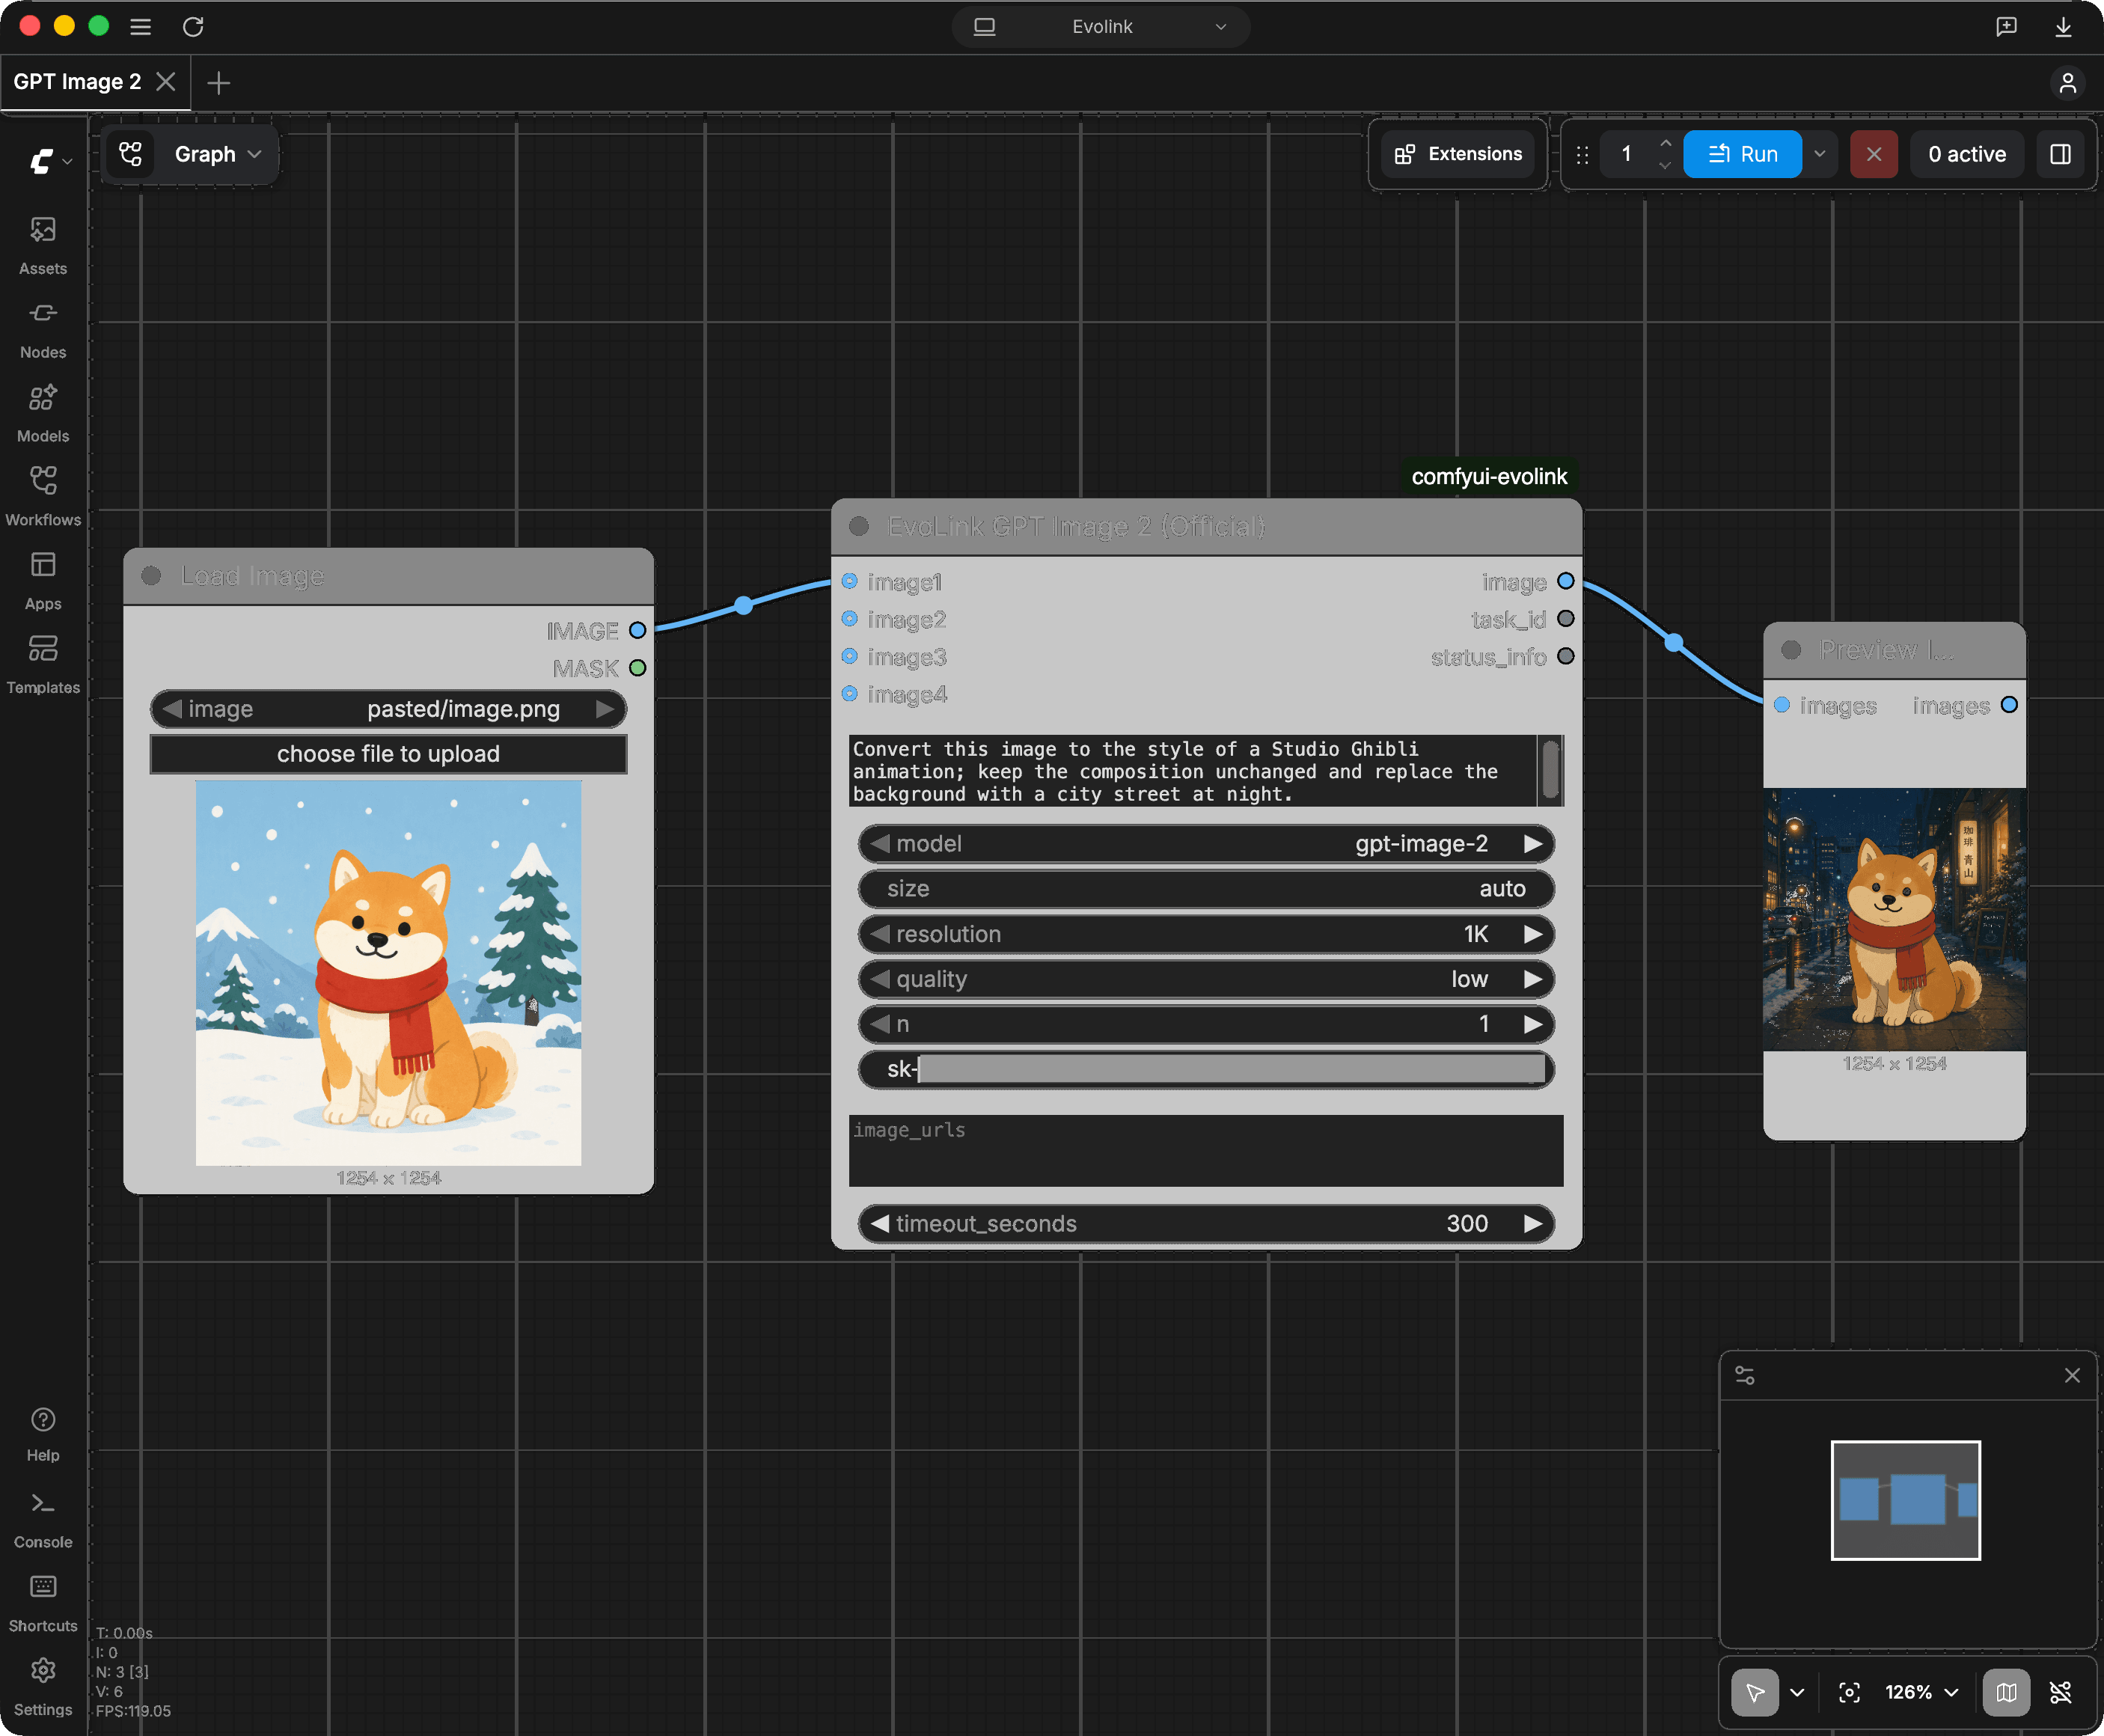
Complete image-to-image wiring: Load Image → image1, edit instruction in the prompt (example: Ghibli style, night street background) — composition preserved
- Multiple references: sockets
image1–image4plus theimage_urlstext box (one public URL per line) can be mixed — up to 16 images total - Complex workflows: the bundled EvoLink Upload Image (Official) node converts local images to URL text (not needed for regular img2img)
- Ready-made workflows: example_workflows ships text2img / img2img / multi-reference examples. Each example’s result PNG has the full workflow embedded — download the image and drag it onto the canvas to restore every node and connection (native ComfyUI behavior); matching JSON files are also provided
Parameters
gpt-image-2, the prompt must meet both the character and byte limits. Different characters use different numbers of UTF-8 bytes, so use the actual encoded byte count. If either limit is exceeded, shorten the prompt before resubmitting.image (result, already downloaded), task_id (for billing lookups & support), status_info (run summary: time, credits used, etc.).
Billing & self-service checks
- Pay-as-you-go, no subscription: credits are reserved at submission (
credits_reserved) and settled on actual usage at completion - Failed / timed-out tasks are not charged — credits are refunded automatically
- Cache hits are free: unchanged parameters re-run from ComfyUI’s local cache
- Every task is auditable: look up any
task_idin the task logs; send thetask_idto support if you have questions about a charge
FAQ
The EvoLink node doesn't show up in search?
The EvoLink node doesn't show up in search?
custom_nodes; ② no double-nested folder from unzipping (__init__.py must be visible when you open the folder); ③ you fully restarted ComfyUI (console window closed, not just the browser); ④ search the startup log for evolink — screenshot any red error for support. aki all-in-one package users can also run a one-click environment scan from the launcher’s Troubleshooting panel.Manager install fails with only custom nodes from the default channel can be installed?
Manager install fails with only custom nodes from the default channel can be installed?
security_level to weak, install, then set it back to normal — or simply use Option C (git) / Option D (ZIP) instead; the plugin works identically.Manager reports Neither pip nor uv are available during install?
Manager reports Neither pip nor uv are available during install?
requests, which ComfyUI already bundles. If the list shows Restart Required, restart and the nodes will load fine.Task finished but no image appears?
Task finished but no image appears?
image output isn’t connected to a Preview/Save Image node. Wire it up and run again — the cached result shows instantly at no extra charge.The media assets panel says no generated files found?
The media assets panel says no generated files found?
output folder, use a Save Image node.402 / insufficient quota?
402 / insufficient quota?
429 / too many requests?
429 / too many requests?
Content policy failure?
Content policy failure?
Result links expired?
Result links expired?
Spinning for a long time?
Spinning for a long time?
timeout_seconds). Timeouts are not charged — verify final task status in the task logs.Migrating from the legacy or community plugin?
Migrating from the legacy or community plugin?
image1. Community ComfyUI_EvoLink: parameter names match; its imgbb-based Evolink Image Input node is no longer needed (connect images straight to image1); poll_interval/max_polls became timeout_seconds. Both plugins can coexist.Can't open 127.0.0.1:8188 in the browser?
Can't open 127.0.0.1:8188 in the browser?
To see the GUI go to (the first launch is slow); if it still won’t open, try http://localhost:8188, or check whether a system proxy / VPN is intercepting local addresses (add 127.0.0.1 to the proxy bypass list). If you use a proxy, set api.evolink.ai and files-api.evolink.ai to connect directly.Which models are supported? What about video?
Which models are supported? What about video?
gpt-image-2. Nano Banana (Gemini series), Seedream, and video models (Veo / Sora / Kling) are on the roadmap; meanwhile every model in the full catalog can be called via the raw API.Appendix: call the API without the plugin
Useful for verifying a key, or for models the plugin doesn’t cover yet. Verify your key in 30 seconds (free):{"data":[{"id":...) means the key works; Unauthorized means it doesn’t.
Submit a generation task:
id (starts with task-unified-), then poll until status is completed; the results array holds the image URLs (download within 24 hours):